Oven Light Not Working? Complete Bulb & Switch Repair Guide Toronto
A working oven light is essential for monitoring your food without opening the door and losing heat. When lights burn out, flicker, or won't turn on, it affects cooking convenience and energy efficiency. Here's your complete guide to diagnosing and fixing oven light problems.
Common Oven Light Problems
BULB BURNED OUT
Symptoms: No light when door opens, dark oven interior Causes: Normal wear, power surges, vibration, heat damage Frequency: Most common oven light issue
LIGHT SWITCH FAILURE
Symptoms: Light doesn't turn on when door opens, stays on when closed Causes: Worn switch contacts, mechanical failure, grease buildup Impact: Light won't respond to door position
FLICKERING LIGHT
Symptoms: Light flickers, dims, or intermittent operation Causes: Loose connections, failing bulb, voltage fluctuations Result: Unreliable illumination, potential bulb damage
LIGHT COVER ISSUES
Symptoms: Cracked or missing light cover, heat damage Causes: High temperatures, impact damage, age Safety concern: Exposed bulb, potential glass in food
WIRING PROBLEMS
Symptoms: No power to light fixture, blown fuses Causes: Damaged wires, loose connections, moisture damage Complexity: May require professional diagnosis
Understanding Oven Light Systems
LIGHT SWITCH TYPES
Door-Activated Switch
- Location: Usually on door frame
- Function: Turns light on when door opens
- Common issues: Grease buildup, mechanical wear
- Adjustment: May be adjustable for proper contact
Manual Light Switch
- Location: On control panel
- Function: User controls light independently
- Benefits: Can check food without opening door
- Problems: Switch failure, wiring issues
Automatic Timer
- Function: Light turns off after set time
- Purpose: Energy saving, bulb life extension
- Issues: Timer failure, incorrect timing
BULB SPECIFICATIONS
Standard Oven Bulbs
- Wattage: Usually 25-40 watts
- Type: Appliance bulbs (heat-resistant)
- Base: E26 (standard) or E12 (candelabra)
- Temperature rating: Up to 300°F (150°C)
LED Oven Bulbs
- Advantages: Longer life, less heat, energy efficient
- Considerations: Must be oven-rated
- Cost: Higher initial cost, lower operating cost
- Compatibility: Check oven specifications
Diagnosing Light Problems
INITIAL ASSESSMENT
Visual Inspection
- Look at bulb through oven window or door
- Check for obvious damage - cracked glass, dark spots
- Inspect light cover for cracks or damage
- Examine door switch for visible problems
Functional Testing
- Open oven door - light should turn on
- Close door slowly - note when light turns off
- Try manual switch if equipped
- Check for flickering during operation
Safety Checks
- Ensure oven is cool before inspection
- Turn off power at breaker for electrical work
- Check for loose glass or debris
- Verify proper light cover installation
DETAILED DIAGNOSIS
Testing the Bulb
- Remove bulb carefully (oven must be cool)
- Inspect filament - should be intact
- Test in another fixture if possible
- Check for loose connections in socket
Switch Testing
- Locate door switch (usually on frame)
- Press switch manually while door open
- Check for proper movement and spring return
- Look for grease or debris blocking operation
Electrical Testing
- Use multimeter to test voltage at socket
- Check continuity through switch
- Test wiring connections for looseness
- Verify proper grounding
DIY Repair Solutions
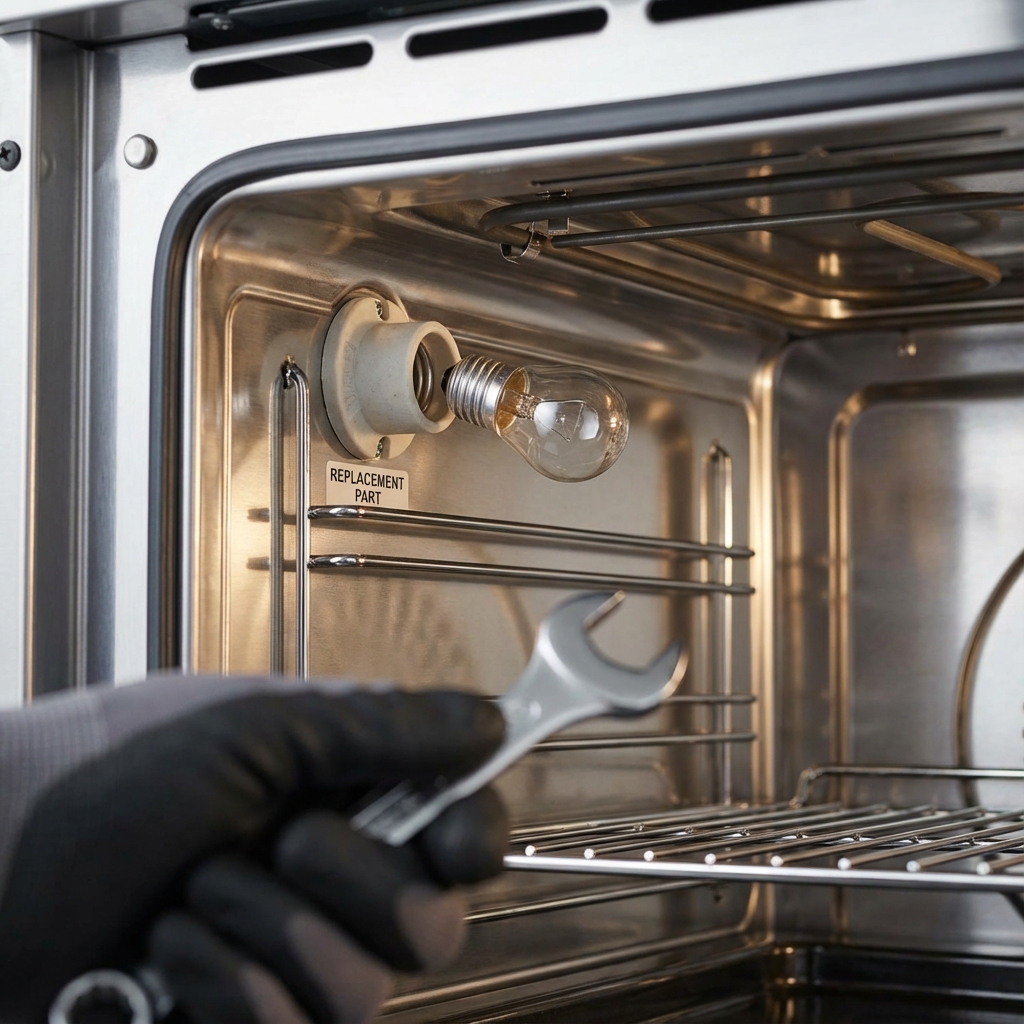
REPLACING OVEN BULB
Tools Needed
- Replacement bulb (correct wattage and type)
- Work gloves
- Flashlight or headlamp
- Step stool if needed
Step-by-Step Process
- Turn off oven and let cool completely
- Turn off power at circuit breaker
- Remove light cover (usually twists off or has clips)
- Unscrew old bulb carefully (may be hot)
- Install new bulb - don't overtighten
- Replace light cover securely
- Restore power and test operation
Important Tips
- Use only oven-rated bulbs - regular bulbs will fail quickly
- Don't touch bulb glass with bare hands - oils cause hot spots
- Check wattage rating - too high can damage fixture
- Ensure proper fit - wrong base size won't work
CLEANING LIGHT SWITCH
For Door-Activated Switches
- Turn off power for safety
- Clean around switch with degreasing cleaner
- Work switch several times to break up buildup
- Use compressed air to blow out debris
- Apply small amount of electrical contact cleaner
For Grease Buildup
- Remove switch cover if accessible
- Clean contacts with electrical contact cleaner
- Remove grease with appropriate degreaser
- Dry thoroughly before reassembly
- Test operation before closing up
ADJUSTING DOOR SWITCH
If Light Doesn't Turn On
- Check switch position relative to door
- Look for adjustment screws on switch mount
- Adjust switch so door activates it properly
- Test with door at various positions
- Secure adjustment when working properly
If Light Stays On
- Check that door fully closes switch
- Adjust switch position if possible
- Clean switch contacts for proper closure
- Verify door alignment - may need door adjustment
LIGHT COVER REPAIR
For Cracked Covers
- Remove damaged cover carefully
- Order replacement using model number
- Clean fixture while cover is off
- Install new cover according to instructions
- Test fit before final installation
Temporary Solutions
- Use aluminum foil as temporary shield (not permanent)
- Avoid using oven until proper cover installed
- Don't operate with exposed bulb
Professional Repair Situations
WIRING PROBLEMS
Call professional for:
- No power to light fixture
- Blown fuses when replacing bulb
- Burnt or damaged wires
- Multiple electrical issues
SWITCH REPLACEMENT
Professional needed when:
- Switch mechanism broken
- Internal wiring damaged
- Control panel integration required
- Warranty considerations
FIXTURE REPLACEMENT
Complex repairs requiring expertise:
- Complete light assembly replacement
- Built-in fixture modifications
- Electrical box replacement
- Code compliance issues
Safety Considerations
ELECTRICAL SAFETY
- Always turn off power before electrical work
- Use proper bulb ratings - never exceed wattage
- Don't work on hot ovens - allow complete cooling
- Check for proper grounding
HEAT PROTECTION
- Use heat-resistant bulbs only
- Ensure proper ventilation around fixture
- Don't block air circulation with covers
- Monitor for overheating signs
GLASS SAFETY
- Handle bulbs carefully - they can shatter
- Clean up glass immediately if broken
- Use proper disposal for old bulbs
- Wear gloves when handling
Maintenance Tips
EXTENDING BULB LIFE
- Use correct wattage - higher wattage shortens life
- Avoid frequent on/off cycling
- Keep oven clean - grease and debris cause overheating
- Check connections periodically for tightness
REGULAR CLEANING
- Clean light cover monthly with mild soap
- Remove grease buildup around switch
- Check for loose connections during routine maintenance
- Replace bulbs before they burn out completely
PREVENTIVE MEASURES
- Use oven light sparingly - only when needed
- Keep door seals clean for proper switch operation
- Avoid slamming door - can damage switch
- Monitor for early failure signs
Toronto-Specific Considerations
POWER QUALITY
Hydro One fluctuations: Can shorten bulb life Older home wiring: May have voltage variations Surge protection: Consider for expensive ovens
PARTS AVAILABILITY
- Local appliance stores carry common bulbs
- Hardware stores have basic replacement parts
- Specialty suppliers for hard-to-find components
CLIMATE EFFECTS
Winter heating: Can cause condensation issues Summer humidity: May affect electrical connections Temperature swings: Can cause expansion/contraction
Cost Analysis
DIY REPAIRS
- Standard oven bulb: $5-15
- LED oven bulb: $15-30
- Light cover: $20-50
- Basic tools: $20-40
PROFESSIONAL REPAIRS
- Switch replacement: $100-200
- Wiring repair: $150-300
- Complete fixture: $200-400
- Service call: $100-150
COST-SAVING TIPS
- Buy bulbs in bulk for multiple ovens
- Choose LED for longer life
- Regular maintenance prevents major repairs
- DIY simple replacements
Troubleshooting Guide
LIGHT WON'T TURN ON
- Check bulb - replace if burned out
- Test switch - clean or adjust if needed
- Verify power - check breaker and connections
- Inspect wiring - look for damage
LIGHT FLICKERS
- Tighten bulb - may be loose
- Check connections - clean if corroded
- Test voltage - may have power quality issues
- Replace bulb - may be failing
LIGHT STAYS ON
- Check door switch - may need adjustment
- Clean switch - grease may prevent closure
- Verify door alignment - may not close properly
- Test switch mechanism - may be stuck
LIGHT COVER PROBLEMS
- Inspect for cracks - replace if damaged
- Check mounting - ensure secure fit
- Clean regularly - prevent buildup
- Use proper bulb - prevent overheating
When to Replace vs. Repair
REPAIR IF:
- Simple bulb replacement
- Minor switch adjustment
- Cleaning resolves issue
- Oven is relatively new
REPLACE IF:
- Multiple electrical problems
- Fixture physically damaged
- Repeated failures
- Cost exceeds 50% of new oven
Emergency Situations
SPARKING LIGHT FIXTURE
- Turn off power immediately
- Don't touch fixture
- Ventilate area
- Call professional
- Don't use oven
BROKEN BULB IN SOCKET
- Turn off power
- Let oven cool completely
- Use needle-nose pliers to remove base
- Clean socket thoroughly
- Install new bulb
FAQ
Q: Can I use a regular light bulb in my oven? A: No, you must use appliance-rated bulbs designed for high temperatures. Regular bulbs will fail quickly.
Q: Why does my oven light burn out frequently? A: Common causes include using wrong wattage, power surges, vibration, or excessive heat from dirty oven.
Q: Is it safe to use my oven without a light? A: Yes, but it's less convenient. Ensure the light cover is in place to protect the fixture.
Q: Can I install an LED bulb in my oven? A: Only if it's specifically rated for oven use. Check your oven manual for compatibility.
Q: How often should I replace my oven light bulb? A: With normal use, oven bulbs typically last 1-2 years. LED bulbs can last much longer.
Don't cook in the dark! JK Appliances provides quick oven light repairs throughout Toronto. From simple bulb replacement to complex wiring issues, our technicians can restore your oven's illumination. Call (647) 560-8966 or book online for same-day service.
