Oven Cooking Unevenly? Fix Temperature Hot Spots in Toronto
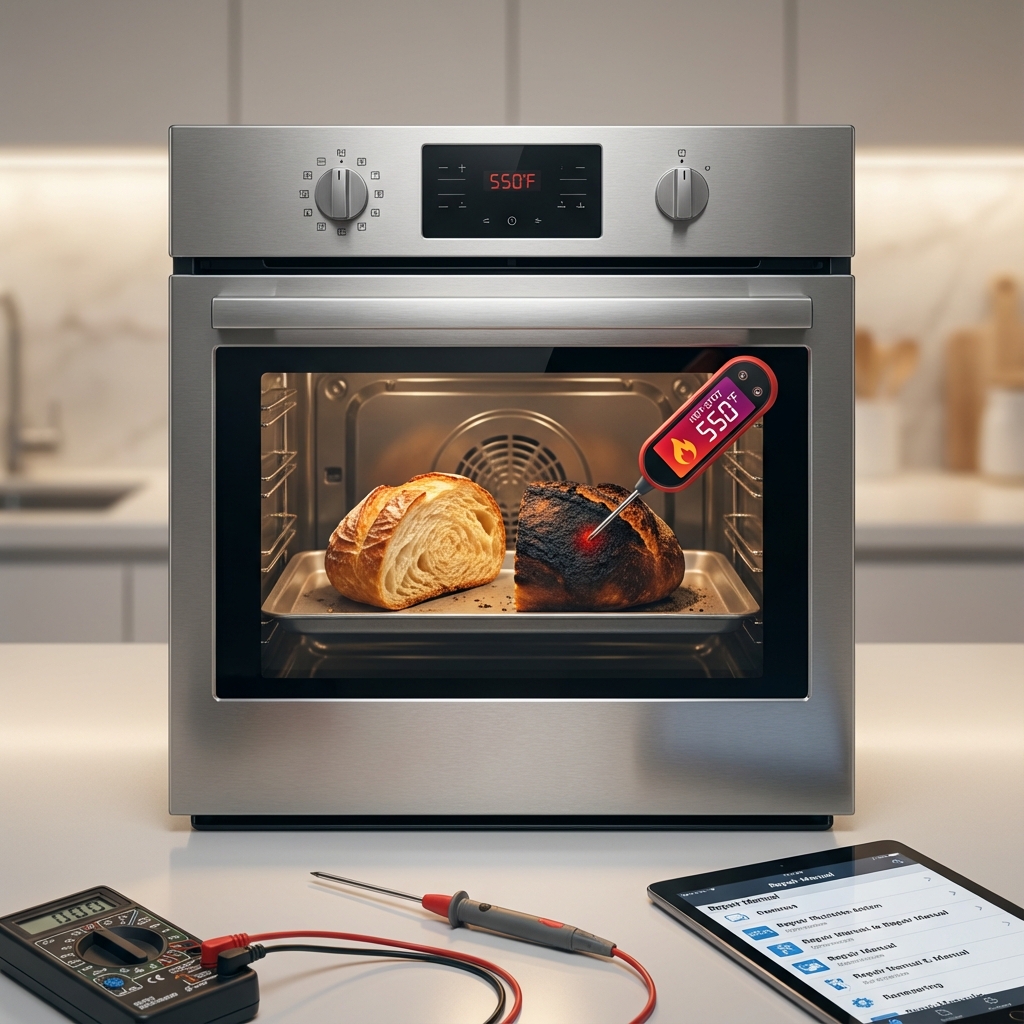
If your oven is cooking unevenly with some areas burning while others remain undercooked, you're dealing with a frustrating but common problem. Uneven oven temperature creates hot and cold spots that ruin baking, roasting, and overall cooking quality.
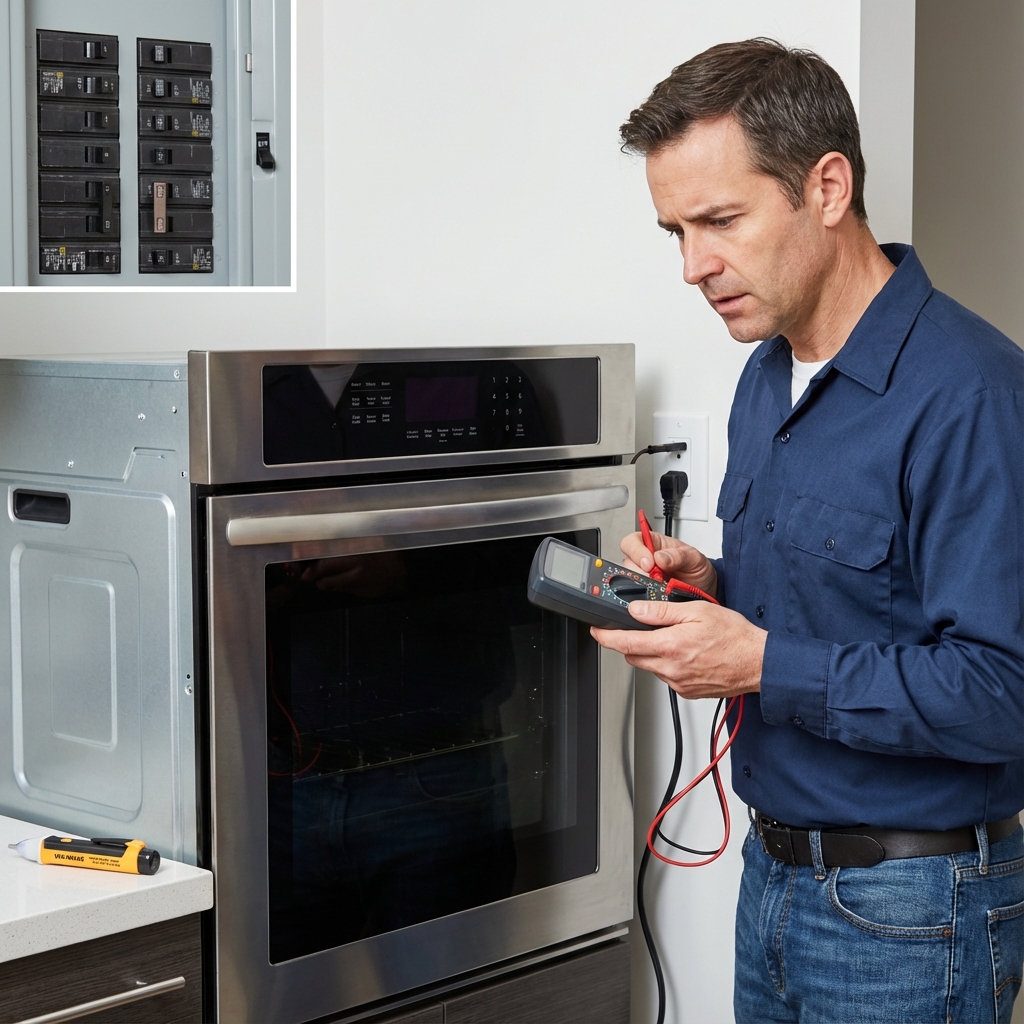
At JK Appliances Toronto, we repair hundreds of ovens with uneven heating issues every year. This comprehensive guide explains why your oven cooks unevenly and how to fix it for all major brands across Toronto and the GTA.
Quick Answer: Is your oven cooking food unevenly with hot and cold spots? Learn the causes of uneven oven temperatures and how to fix uneven baking and roasting problems for all brands in Toronto. This is a common issue that can usually be resolved with proper troubleshooting. If the problem persists, professional diagnosis is recommended.
What Causes Uneven Oven Cooking?
Normal vs. Abnormal Temperature Variation
All ovens have some temperature variation—this is normal:
- Conventional ovens: ±25°F variation is acceptable
- Convection ovens: ±15°F variation is normal
- Hot air rises, creating naturally warmer upper areas
Abnormal uneven cooking shows these signs:
- Food consistently burns on one side
- Cakes rise unevenly or collapse
- Cookies brown only on edges
- Roasts cook unevenly despite rotation
- Temperature difference exceeds 50°F
- Visual hot or cold spots
Top 10 Causes of Uneven Oven Temperature
1. Faulty Oven Temperature Sensor
The Problem: The temperature sensor (RTD probe) monitors oven heat and signals the control board to cycle heating elements on and off.
How It Causes Uneven Cooking:
- Sensor reads incorrectly
- Control board gets wrong temperature data
- Elements cycle inappropriately
- Creates temperature swings and hot spots
Signs of Sensor Problems:
- Oven temperature very different from set point
- Food burns despite correct settings
- Oven runs too hot or too cold
- Temperature fluctuates wildly during cooking
DIY Testing:
- Access sensor (usually rear wall)
- Use multimeter to test resistance
- At room temp (70°F), should read ~1100 ohms
- Resistance increases with temperature
- If reading is off by >200 ohms, replace sensor
Professional Repair:
- Sensor replacement: $120-$180
- Includes testing and calibration
- Same-day service available
2. Worn or Damaged Heating Elements
Electric Ovens: Have 2-3 heating elements (bake, broil, convection)
How Elements Cause Uneven Heating:
- Weak bake element creates cool bottom
- Damaged broil element causes uneven top heat
- Elements with hot spots heat unevenly
- Failed convection element (if equipped) reduces air circulation
Visual Inspection:
- Remove oven racks
- Turn on oven and observe elements
- Elements should glow evenly bright red
- Look for dark spots, blistering, or breaks
Common Element Problems:
Bake Element (Bottom):
- Responsible for primary heat
- Weak spot = undercooked bottoms
- Complete failure = no bottom heat
Broil Element (Top):
- Provides top heat and assists baking
- Weak areas cause uneven browning
- Imbalanced heat distribution
Convection Element (Rear):
- Powers fan-assisted heating
- Failure stops air circulation
- Creates static hot/cold zones
Replacement Costs:
- Bake element: $150-$225
- Broil element: $140-$210
- Convection element: $180-$280
3. Faulty Oven Door Seal (Gasket)
The Problem: The door gasket creates an airtight seal. When damaged, heat escapes creating significant temperature loss and uneven heating.
How It Affects Cooking:
- Heat escapes from gaps
- Oven struggles to maintain temperature
- Cold air enters, creating drafts
- Front area cooks slower than back
- Longer preheat times
- Energy waste
Inspect Your Door Seal:
- Cool oven completely
- Examine entire gasket perimeter
- Look for:
- Tears or rips
- Compression/flattening
- Hardening/brittleness
- Gaps when door closes
- Visible light through edges
Paper Test:
- Place paper between door and frame
- Close door
- Try pulling paper out
- Should have resistance all around
- Easy pull = poor seal
Replacement:
- DIY: $30-$60 for gasket
- Professional: $120-$180 installed
- Takes 30-45 minutes
4. Oven Not Level
The Problem: An unlevel oven affects heat distribution as hot air rises unevenly.
How It Causes Problems:
- Heat pools to one side
- Uneven air circulation
- Liquids (like cake batter) settle unevenly
- Food slides during cooking
Check If Oven Is Level:
- Place level on oven floor
- Check front-to-back
- Check side-to-side
- Should be perfectly level or very close
How to Level Your Oven:
Freestanding Ranges:
- Adjust front legs (usually screw-type)
- Use wrench or pliers
- Both front legs should match
- Rear leveling leg self-adjusts
Built-In Wall Ovens:
- May require cabinet adjustment
- Shim installation opening if needed
- Professional installation recommended
Cost: Free (DIY) or $60-$100 (professional)
5. Blocked or Damaged Convection Fan
For Convection Ovens Only
The Problem: The convection fan circulates hot air for even cooking. When it's blocked or broken, you lose the primary benefit of convection cooking.
How It Affects Cooking:
- No air circulation
- Oven acts like conventional model
- Hot spots develop
- Longer cooking times
- Uneven browning
Signs of Fan Problems:
- No fan noise during convection mode
- Weak or irregular airflow
- Loud grinding or squealing
- Convection mode not improving evenness
Check Fan Operation:
- Select convection mode
- Listen for fan motor
- Feel for airflow from vents
- Should start within 1-2 minutes
Common Fan Issues:
Blocked Fan:
- Food debris in fan area
- Clean fan blade and housing
- Usually fixes issue
Failed Fan Motor:
- Motor doesn't run
- Grinding noises
- Requires replacement
- Cost: $200-$350
Control Board Issue:
- Fan doesn't receive power signal
- May need board repair
- Cost: $250-$450
6. Incorrect Oven Calibration
The Problem: Over time, ovens can lose calibration, causing the actual temperature to differ from the display.
How It Causes Uneven Cooking:
- Oven thinks it's at correct temp
- Actually running 25-75°F off
- Elements cycle at wrong times
- Creates temperature imbalances
Test Oven Calibration:
- Get oven thermometer (not digital)
- Place in center of oven
- Preheat to 350°F
- Wait 20 minutes after preheat signal
- Read thermometer
- Should be within 25°F of set temp
Multiple Position Test:
- Place thermometer in different positions
- Front, back, left, right, center
- Note temperature variations
- Identifies specific hot/cold zones
Recalibration:
Manual Adjustment (many modern ovens):
- Access settings/calibration menu
- Typically: hold temperature buttons
- Adjust +/- in 5°F increments
- Can usually adjust ±35°F
- Consult manual for specific steps
Professional Calibration:
- Involves control board adjustment
- More precise than manual method
- Cost: $100-$150
- Recommended for older ovens
7. Damaged Oven Insulation
The Problem: Oven insulation surrounds the cavity, retaining heat. When damaged, heat escapes creating cold spots and inefficiency.
How It Affects Cooking:
- Heat loss from specific areas
- Cold spots where insulation is damaged
- Oven struggles to maintain temperature
- Longer preheat times
- Higher energy bills
Signs of Insulation Damage:
- Oven exterior unusually hot in spots
- Nearby cabinets feel warm
- Oven takes forever to preheat
- Visible gaps around oven edges
- Previous rodent problems (they eat insulation)
Inspection:
- Requires oven removal (built-in)
- Or pulling range forward (freestanding)
- Professional inspection recommended
- Safety issue if severely damaged
Repair:
- Remove old insulation
- Install new high-temp insulation
- Seal gaps and air leaks
- Cost: $200-$400 depending on extent
8. Malfunctioning Oven Control Board
The Problem: The control board is the "brain" managing all oven functions including heating element cycling, fan operation, and temperature regulation.
How It Causes Uneven Cooking:
- Incorrect element cycling
- Fan doesn't activate properly
- Temperature sensor readings ignored
- Erratic oven behavior
Signs of Control Board Issues:
- Random error codes
- Oven turns on/off unexpectedly
- Multiple features malfunctioning
- Display glitches or errors
- Buttons not responding
- Oven stuck in one mode
Diagnosis:
- Requires multimeter testing
- Check voltage outputs
- Test relay functionality
- Professional diagnosis recommended
Repair vs. Replace:
Repair (if possible):
- Replace failed components on board
- Reprogram/reset board
- Cost: $150-$250
Replacement:
- New control board
- Includes programming
- Cost: $250-$500 depending on brand
- Samsung/LG: $300-$450
- Whirlpool/GE: $250-$400
- High-end (Miele/Bosch): $400-$600
9. Improper Rack Positioning
Often Overlooked: Where you place food dramatically affects cooking evenness.
Understanding Oven Zones:
Top Third:
- Hottest area (heat rises)
- Best for: broiling, browning tops
- Too hot for most baking
Middle Third:
- Most even temperature zone
- Best for: general baking, roasting
- Where most recipes assume placement
Bottom Third:
- Cooler, more moist
- Best for: items needing gentle heat
- Bake element provides direct bottom heat
Multi-Rack Cooking:
- Space racks evenly
- Allow air circulation
- Rotate pans halfway through
- Avoid overcrowding
Best Practices:
- Use middle rack as default
- One-rack cooking = better evenness
- Leave 1-2" around pans for airflow
- Rotate food halfway through cooking
- Don't block vents
10. Damaged or Blocked Oven Vents
The Problem: Ovens have vents for air circulation and moisture escape. Blocked vents disrupt proper heat distribution.
How Vents Affect Cooking:
- Allow heated air to circulate
- Release moisture (important for crispy results)
- Prevent pressure buildup
- Maintain consistent temperature
Vent Locations:
- Freestanding ranges: usually rear or top of backguard
- Wall ovens: varies by model (front, sides, or rear)
- Check manual for exact location
Common Vent Problems:
- Grease buildup blocking airflow
- Food debris in vent
- Hood fan creating negative pressure
- External vent (if gas) blocked
Cleaning Vents:
- Locate all vent openings
- Use vacuum with crevice tool
- Clean with degreaser if needed
- Ensure completely clear
- Test oven after cleaning
Brand-Specific Uneven Cooking Issues
Samsung Ovens
Common Issues:
- Convection fan failures common after 3-5 years
- Control board glitches affecting temperature regulation
- Dual-element systems sometimes imbalanced
Typical Problems:
- Uneven heating in flex duo models
- Temperature sensor drift
- Fan motor bearing failures
Solutions:
- Fan motor replacement: $250-$350
- Control board update/replacement: $300-$450
- Sensor replacement: $140-$180
LG Ovens
Common Issues:
- ProBake system uneven heating
- Convection conversion issues
- Temperature calibration drift
Typical Problems:
- Bottom element uneven heating
- ThinQ app showing incorrect temperatures
- Convection not activating
Solutions:
- Element replacement: $180-$260
- Sensor recalibration: $120-$160
- Control board repair: $280-$400
Whirlpool/KitchenAid Ovens
Common Issues:
- AccuBake sensor failures
- Hidden bake element problems
- Door seal degradation
Typical Problems:
- Temperature swings ±40°F
- Uneven baking in lower third
- Front-to-back temperature difference
Solutions:
- Sensor replacement: $130-$175
- Bake element: $160-$220
- Door gasket: $100-$150
GE Ovens
Common Issues:
- Rack guide interference with heating
- Self-clean cycle damaging elements
- True European convection fan issues
Typical Problems:
- Hot spots near element areas
- Convection not improving evenness
- Calibration drift over time
Solutions:
- Element replacement: $150-$240
- Fan motor: $220-$320
- Recalibration: $100-$140
Bosch Ovens
Common Issues:
- European convection system complex
- Temperature sensor precision issues
- Door seal expensive to replace
Typical Problems:
- Slight temperature variations
- Moisture control affecting evenness
- Premium parts = higher repair costs
Solutions:
- Sensor replacement: $180-$260
- Element: $200-$350
- Door seal: $150-$220
DIY Fixes for Uneven Oven Cooking
Quick Fixes You Can Try
1. Oven Thermometer Test:
- $10-$15 investment
- Place in multiple oven positions
- Map your oven's hot and cold spots
- Adjust cooking positions accordingly
2. Rotate Food During Cooking:
- Turn pans 180° halfway through
- Move to different rack if needed
- Especially important for baking
3. Use Light-Colored Bakeware:
- Dark pans absorb more heat
- Can create hot spots
- Light/shiny pans = more even cooking
4. Recalibrate Your Oven:
- Check your manual
- Most modern ovens allow adjustment
- Can offset temperature by ±35°F
- Free and easy to do
5. Clean Your Oven:
- Built-up grease affects heat distribution
- Clean elements, racks, and cavity
- Use self-clean cycle if available
- Or use oven cleaner (properly ventilated)
6. Check Door Seal:
- Visual inspection is free
- Replace if obviously damaged
- Replacement gasket: $30-$60
- Easy DIY installation
7. Level Your Oven:
- Use a spirit level
- Adjust front legs
- Takes 10 minutes
- Can significantly improve evenness
When DIY Isn't Enough
Call a Professional If:
- Problems persist after basic fixes
- You see visible element damage
- Error codes appear
- Convection fan not working
- Oven won't maintain temperature
- Door won't seal properly
- Insulation concerns
Preventing Uneven Oven Cooking
Regular Maintenance Tips
Monthly:
- Wipe down oven interior
- Clean spills immediately
- Check door seal condition
- Test oven temperature with thermometer
Quarterly:
- Deep clean oven cavity
- Clean or replace vent filter (if applicable)
- Check oven level
- Inspect heating elements
Annually:
- Professional calibration check
- Element condition assessment
- Door seal replacement (if needed)
- Control board function test
Best Cooking Practices
Proper Preheating:
- Always preheat fully
- Add extra 5-10 minutes beyond beep
- Use oven thermometer to verify
- Don't open door during preheat
Smart Pan Placement:
- Use middle rack for most cooking
- Allow 2" clearance around pans
- Don't cover racks with foil
- Use proper-sized pans for food quantity
Temperature Settings:
- Use convection when available
- Reduce temp 25°F for convection
- Don't set higher temp to "cook faster"
- Use appropriate mode for food type
Professional Oven Repair in Toronto
When to Call JK Appliances
Immediate Service Needed:
- Complete element failure
- Oven won't heat at all
- Strange smells or sounds
- Visible sparking or smoke
- Error codes appearing
- Safety concerns
Scheduled Service:
- Persistent uneven cooking
- Temperature calibration needed
- Door seal replacement
- Routine maintenance
- Annual inspection
Our Repair Process
1. Diagnostic Visit:
- $80-$120 (waived if repair approved)
- Complete oven inspection
- Identify all issues
- Provide detailed quote
2. Repair Service:
- Same-day service available
- Genuine OEM parts
- Certified technicians
- All brands serviced
3. Testing & Verification:
- Temperature testing
- Full functionality check
- Customer education
- Prevention tips
4. Warranty:
- 180-day parts \u0026 labor warranty
- Guaranteed satisfaction
- Follow-up support
Repair Cost Expectations
Common Repairs (Parts + Labor):
| Repair Type | Cost Range | |------------|------------| | Temperature Sensor | $120-$180 | | Heating Element | $150-$280 | | Door Seal | $100-$180 | | Convection Fan Motor | $220-$350 | | Control Board | $250-$500 | | Calibration Service | $100-$150 | | Insulation Replacement | $200-$400 |
Prices include parts, labor, and warranty
FAQs About Uneven Oven Cooking
Q: How much temperature variation is normal? A: Up to 25°F in conventional ovens, 15°F in convection ovens is acceptable.
Q: Why does my oven cook faster on one side? A: Usually caused by weak heating elements, poor calibration, or damaged door seals creating uneven heat distribution.
Q: Can I still use my oven if it cooks unevenly? A: Yes, but results will be inconsistent. Rotate food frequently and use an oven thermometer to compensate.
Q: How long does oven repair take? A: Most uneven cooking repairs completed same-day, typically 1-2 hours including diagnosis.
Q: Is it worth repairing an old oven? A: If less than 8 years old and repair costs less than 50% of replacement, repair is usually worthwhile.
Q: Why is my convection oven cooking unevenly? A: Most often the convection fan has failed or is blocked, eliminating the air circulation benefit.
Q: Can I replace oven parts myself? A: Simple parts like door seals and some elements can be DIY-replaced. Elements require electrical knowledge and safety precautions.
Service Areas in Toronto \u0026 GTA
We provide expert oven repair services throughout:
- Downtown Toronto
- North York
- Scarborough
- Etobicoke
- Mississauga
- Brampton
- Markham
- Richmond Hill
- Vaughan
- Ajax
- Oakville
- Burlington
- Pickering
- Whitby
Suffering from uneven oven cooking in Toronto? Contact JK Appliances at +1 647-560-8966 for same-day diagnosis and repair. We fix all major brands across the Greater Toronto Area with 180-day warranty on all repairs!
Common Questions People Ask
Q: Is it normal for my oven to have issues? No, this is not normal behavior and indicates an underlying issue that should be addressed promptly to prevent further damage.
Q: Can I fix this oven problem myself? Some basic issues can be resolved with DIY troubleshooting, but complex problems require professional diagnosis to avoid safety risks and warranty issues.
Q: How much does professional oven repair cost in Toronto? Repair costs typically range from $150-$400 depending on the specific issue and parts needed. Our technicians provide free estimates before any work begins.
Q: How long does oven repair take? Most repairs are completed within 1-2 hours during a single visit. Some cases may require ordering specialty parts with a follow-up appointment.
Q: Should I repair or replace my oven? If your oven is less than 8 years old and repair costs are under 50% of replacement cost, repair is usually the better value. Our technicians can help you make the right decision.
Q: Do you offer same-day oven repair in Toronto? Yes! We offer same-day and emergency repair services throughout Toronto and the Greater Toronto Area for urgent issues.
Q: What brands of oven do you repair? We service all major brands including Bosch, Samsung, LG, Whirlpool, KitchenAid, GE, Maytag, Frigidaire, Miele, and more.
Q: Is oven repair covered by warranty? Many oven issues are covered under manufacturer warranty. We can help verify your warranty status and handle claim processing.
Expert Tips & Pro Insights
💡 Pro Tip: Regular maintenance can prevent 80% of appliance problems. Follow manufacturer guidelines for cleaning and care.
⚠️ Safety Warning: Always disconnect power before attempting any repairs or inspections. If you smell gas, evacuate immediately and call emergency services.
🔧 Technician Insight: Many issues that seem complex often have simple solutions. Start with basic troubleshooting before assuming the worst.
📞 When to Call a Professional: If you encounter electrical components, gas lines, refrigerant systems, or if basic troubleshooting doesn't resolve the issue, it's time to call an expert.