![Refrigerator Door Not Sealing? Complete Gasket Repair Guide for Toronto [2025]](/images/blog/refrigerator/fridge_door_seal_1765876108838.png)
Refrigerator Door Not Sealing? Complete Gasket Repair Guide for Toronto Homeowners
Key Takeaways
- Main Problem: Refrigerator door not sealing properly, causing cold air loss and higher energy bills
- Common Causes: Dirty gaskets (most common), worn/damaged seals, misaligned door, debris in gasket groove, temperature damage
- Quick Solutions: Deep clean gasket with soapy water, apply petroleum jelly to restore flexibility, adjust door alignment, remove door shelf weight
- Professional Help: Gasket replacement ($150-300), door realignment service ($100-180), professional diagnosis ($80-120 waived with repair)
- Prevention: Clean gaskets monthly, dollar bill test quarterly, avoid door slamming, don't overload door shelves
Expert Insight: This guide is written by JK Appliances' certified refrigerator repair technicians with 15+ years of experience servicing all major brands across Toronto. Our team has replaced thousands of door seals and gaskets for Samsung, LG, Whirlpool, GE, and all premium brands. We specialize in proper gasket installation that lasts.
Quick Answer: If your refrigerator door isn't sealing properly, the most common causes are dirty gaskets, worn or damaged seals, misaligned doors, or debris in the seal groove. Start with the dollar bill test to confirm a seal problem, then clean the gasket with warm soapy water. If cleaning doesn't help, the gasket may need replacement ($150-$300 professionally installed). Contact JK Appliances for same-day refrigerator door seal repair in Toronto and the GTA.
Table of Contents
- Signs Your Refrigerator Door Seal is Failing
- The Dollar Bill Test
- Common Causes of Poor Door Seals
- DIY Fixes for Door Seal Problems
- When to Replace the Gasket
- Professional Gasket Replacement
- Preventing Seal Problems
- Frequently Asked Questions
- Toronto & GTA Service Areas
Signs Your Refrigerator Door Seal is Failing {#signs-of-failing-seal}
A failing door seal causes multiple problems. Watch for these warning signs:
Visual Signs
| Sign | What to Look For | Severity | |------|------------------|----------| | Cracks | Visible splits in the rubber | Moderate-High | | Tears | Chunks missing from gasket | High | | Warping | Seal doesn't lie flat | Moderate | | Hardening | Rubber feels stiff, not flexible | High | | Mold/mildew | Black spots in folds | Low (if cleanable) | | Gaps | Visible space when door closed | High |
Performance Signs
- Refrigerator running constantly - Compressor works overtime
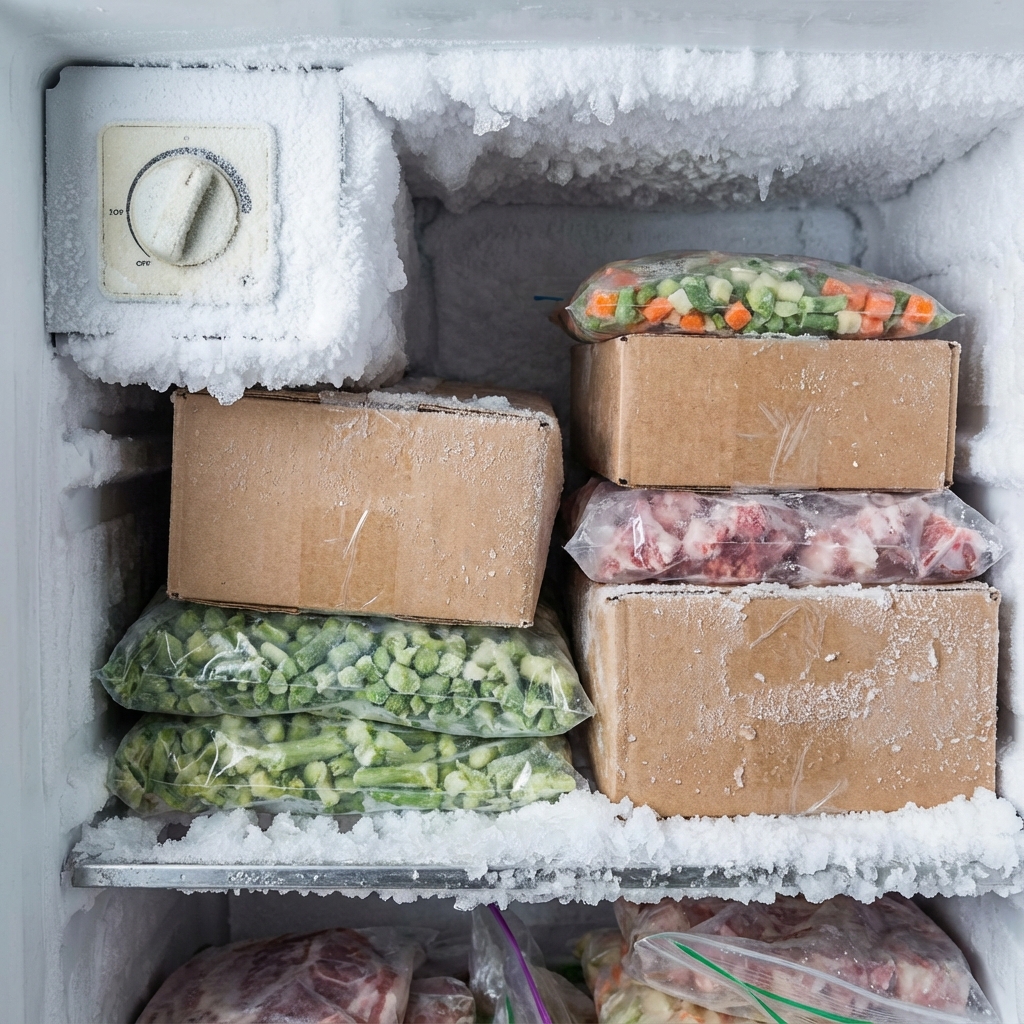
- Frost or ice buildup - Warm air enters and condenses
- Condensation on door - Moisture around seal area
- Food spoiling faster - Temperature not maintained
- Higher energy bills - 10-25% increase common
- Ice on freezer walls - Humidity entering freezer
Related Reading: Why Your Refrigerator is Running Constantly
The Dollar Bill Test {#dollar-bill-test}
The dollar bill test (or paper test) is the easiest way to check your door seal:
How to Perform the Test
- Get a dollar bill (or thin paper strip)
- Open the refrigerator door
- Place the bill so half is inside, half outside
- Close the door on the bill
- Try to pull the bill out
Interpreting Results
| Result | Meaning | Action Needed | |--------|---------|---------------| | Bill slides out easily | Seal is failing | Cleaning or replacement | | Bill slides with some resistance | Seal is weakening | Monitor closely | | Bill requires significant pull | Seal is working | No action needed | | Bill won't slide at all | Excellent seal | No action needed |
Test Multiple Locations
Perform the test at several points around the door:
- Top corners
- Bottom corners
- Hinged side
- Handle side
- Middle of each edge
Seals often fail in specific areas, especially corners and near the hinge.
Common Causes of Poor Door Seals {#causes-of-poor-seals}
Cause 1: Dirty Gaskets (Most Common)
Food spills, grease, and grime prevent proper seal contact.
How dirt affects seals:
- Creates gaps where gasket meets frame
- Prevents proper magnetic adhesion
- Accelerates gasket deterioration
- Attracts mold and mildew
Solution: Clean gaskets monthly (see DIY section)
Cause 2: Worn or Damaged Gaskets
Over time, door gaskets naturally deteriorate.
Signs of wear:
- Rubber becomes hard and inflexible
- Cracks appear in the material
- Gasket doesn't return to shape after bending
- Magnetic strip no longer holds strongly
Average gasket lifespan: 8-12 years Replacement needed: When cleaning no longer helps
Cause 3: Misaligned Door
A door that doesn't hang straight can't seal properly.
Causes of misalignment:
- Overloaded door shelves
- Worn door hinges
- Refrigerator not level
- Damaged door or frame
Check alignment:
- Close door slowly
- Watch how door meets frame
- Look for uneven gaps
- Check if door bounces back
Cause 4: Debris in Gasket Groove
Small items can get lodged in the gasket groove, preventing proper sealing.
Common culprits:
- Food particles
- Twist ties
- Packaging remnants
- Small storage items
Cause 5: Temperature Damage
Extreme temperatures can damage gasket material.
In Toronto climate:
- Garage refrigerators in summer heat
- Unheated spaces in winter
- Near heat sources (oven, dishwasher)
DIY Fixes for Door Seal Problems {#diy-fixes}
Fix 1: Deep Clean the Gasket
Time required: 15-20 minutes Supplies: Warm water, mild dish soap, soft cloth, old toothbrush
Steps:
- Mix warm water with a few drops of dish soap
- Wipe down entire gasket surface
- Use toothbrush to clean in folds and grooves
- Pull gasket gently away from door to clean underneath
- Rinse with clean water and damp cloth
- Dry thoroughly with soft towel
- Wait 10 minutes before closing door
Pro tip: Clean gaskets monthly to prevent buildup
Fix 2: Apply Petroleum Jelly
Purpose: Restores flexibility to hardening gaskets
Steps:
- Clean gasket first (see above)
- Apply thin layer of petroleum jelly
- Work into the rubber material
- Wipe off excess
- Allows better seal and extends life
Note: This is a temporary fix - severely worn gaskets still need replacement
Fix 3: Use a Hair Dryer for Warped Seals
For gaskets that don't lie flat:
- Set hair dryer to low/medium heat
- Warm the gasket evenly (don't overheat)
- Mold gasket into correct shape with fingers
- Hold in place while cooling
- Test seal with dollar bill
Caution: Excessive heat damages gaskets permanently
Fix 4: Adjust Door Alignment
If door is misaligned:
-
Check refrigerator is level
- Place level on top
- Adjust front leveling feet
-
Reduce door weight
- Remove heavy items from door shelves
- Redistribute to interior shelves
-
Tighten hinge screws
- Top hinge most important
- Don't overtighten
-
Adjust hinge if possible
- Some models have adjustable hinges
- Check owner's manual
Fix 5: Check and Clean the Frame
The door frame (where gasket seals against) also matters:
- Wipe frame with warm soapy water
- Remove any debris or residue
- Check for dents or damage
- Ensure surface is smooth
When to Replace the Gasket {#when-to-replace}
Signs Gasket Needs Replacement
Replace your refrigerator door gasket when:
- ✅ Visible cracks or tears in the material
- ✅ Rubber is hard and won't flex
- ✅ Cleaning and conditioning don't help
- ✅ Dollar bill test fails after cleaning
- ✅ Gasket won't stay in channel
- ✅ Mold in gasket that won't clean
- ✅ Severe warping or deformation
Gasket Replacement Options
| Option | Cost | Pros | Cons | |--------|------|------|------| | DIY replacement | $50-$150 (parts) | Saves labour cost | Risk of improper installation | | Professional install | $150-$300 (parts + labour) | Proper fit guaranteed | Higher upfront cost | | Universal gaskets | $30-$80 | Inexpensive | May not fit perfectly | | OEM gaskets | $75-$200 | Perfect fit | Higher cost |
Finding the Right Replacement Gasket
You'll need:
- Refrigerator brand
- Model number (inside door or back)
- Part number (if visible on existing gasket)
Where to buy:
- Manufacturer websites
- Appliance parts stores
- Online retailers (Amazon, PartSelect)
- JK Appliances stocks common gaskets
Professional Gasket Replacement {#professional-replacement}
Why Choose Professional Installation
| DIY Risk | Professional Benefit | |----------|---------------------| | Wrong gasket ordered | Correct part sourced | | Improper stretching during install | Proper installation technique | | Gasket won't stay in channel | Secure, lasting installation | | Time-consuming | Done in 45-90 minutes | | May need to reorder if wrong | First-time correct |
What to Expect from Professional Service
JK Appliances gasket replacement includes:
- Diagnostic check - Confirm gasket is the issue
- Correct part sourcing - OEM or quality aftermarket
- Professional installation - Proper fitting technique
- Door adjustment - Ensure proper alignment
- Seal verification - Dollar bill test confirmation
- 90-day warranty - On parts and labour
Cost of Professional Gasket Replacement in Toronto
| Refrigerator Type | Estimated Cost | |-------------------|---------------| | Top freezer | $150-$200 | | Bottom freezer | $150-$250 | | Side-by-side | $200-$350 (2 doors) | | French door | $200-$400 (2-3 doors) | | Premium brands | $250-$450+ |
Book your appointment: Schedule with JK Appliances
Preventing Seal Problems {#preventing-seal-problems}
Monthly Maintenance
- Wipe down gaskets with damp cloth
- Check for debris in folds
- Inspect for early signs of wear
- Test seal with dollar bill periodically
Good Habits
Do:
- Close door gently
- Don't overload door shelves
- Keep gaskets clean and dry
- Check door closes completely
Don't:
- Slam refrigerator door
- Leave door open longer than needed
- Force door closed when obstructed
- Ignore early seal problems
Environmental Factors
- Keep refrigerator away from heat sources
- Maintain stable room temperature
- Avoid placing in garages (temperature extremes)
- Ensure proper ventilation around unit
Common Questions People Ask
Q: Is it normal for my refrigerator door seal to sealing? complete gasket repair guide for toronto [2025]? No, this is not normal behavior and indicates an underlying issue that should be addressed promptly to prevent further damage.
Q: Can I fix this refrigerator door seal problem myself? Some basic issues can be resolved with DIY troubleshooting, but complex problems require professional diagnosis to avoid safety risks and warranty issues.
Q: How much does professional refrigerator door seal repair cost in Toronto? Repair costs typically range from $150-$400 depending on the specific issue and parts needed. Our technicians provide free estimates before any work begins.
Q: How long does refrigerator door seal repair take? Most repairs are completed within 1-2 hours during a single visit. Some cases may require ordering specialty parts with a follow-up appointment.
Q: Should I repair or replace my refrigerator door seal? If your refrigerator door seal is less than 8 years old and repair costs are under 50% of replacement cost, repair is usually the better value. Our technicians can help you make the right decision.
Q: Do you offer same-day refrigerator door seal repair in Toronto? Yes! We offer same-day and emergency repair services throughout Toronto and the Greater Toronto Area for urgent issues.
Q: What brands of refrigerator door seal do you repair? We service all major brands including Bosch, Samsung, LG, Whirlpool, KitchenAid, GE, Maytag, Frigidaire, Miele, and more.
Q: Is refrigerator door seal repair covered by warranty? Many refrigerator door seal issues are covered under manufacturer warranty. We can help verify your warranty status and handle claim processing.
Frequently Asked Questions About Refrigerator Door Seals {#faqs}
Q: How do I know if my refrigerator door seal is bad? A: Multiple methods confirm bad refrigerator door seals: Perform dollar bill test—close bill in door and try pulling out; slides easily = failing seal, requires significant pull = good seal. Visual inspection revealing cracks, tears, hardening (inflexibility), warping (not lying flat), or mold/mildew in gasket folds. Performance symptoms including refrigerator running constantly trying to maintain temperature, frost or ice buildup from warm air entering, condensation visible around door edges, food spoiling faster than normal indicating temperature fluctuations (check thermometer regularly—should maintain 35-38°F), and energy bills increasing 10-25% without usage changes. Test multiple locations: top corners, bottom corners, hinge side, handle side, middle of each edge—seals often fail in specific areas especially corners and near hinges before complete failure. Check door closure: close door slowly watching for even gaps, listen for proper "seal suction" sound, feel around edges for cold air escaping when refrigerator running. Physical symptoms when near refrigerator suggesting air leakage: feeling cold draft from door area, hearing louder compressor operation compensating for leaks. Perform tests quarterly as preventive maintenance catching problems early before food loss or major energy waste occurs. Professional JK Appliances inspection includes specialized tools measuring seal pressure and thermal imaging detecting cold air leaks invisible to naked eye.
Q: How much does it cost to replace a refrigerator door seal in Toronto? A: Refrigerator door seal replacement costs in Toronto vary by approach and refrigerator type: DIY gasket replacement $50-200 for OEM parts alone (must match exact model), plus your time investment 2-4 hours for first-time installers. Professional installation including parts and labor: Top-freezer models $150-200 (single door, simplest installation), bottom-freezer refrigerators $150-250 (heavier door, more complex), side-by-side units $200-350 (two full-height doors requiring separate gaskets), French door models $200-400+ (two refrigerator doors plus freezer drawer, 2-3 gaskets total), premium brands (Miele, Sub-Zero, Viking) $250-450+ with specialized OEM gaskets. Cost factors: OEM vs aftermarket gaskets (OEM $75-200 per door fits perfectly, aftermarket/universal $30-80 may have gaps), door complexity (integrated handles, ice makers, water dispensers add installation time), gasket availability (common models stock parts, rare models special-order adding 3-7 days), and required door adjustments (misaligned doors need realignment $50-100 additional). At JK Appliances Toronto we provide transparent upfront pricing after model verification, same-day service for common models with parts in stock, 90-day warranty on parts and labor, and honest assessment if simple cleaning suffices avoiding unnecessary replacement. Average professional replacement takes 45-90 minutes including proper installation, door alignment verification, and seal pressure testing. Cost-benefit: $200 seal replacement vs $800-1500 new refrigerator makes repair economical on refrigerators under 10 years old, plus immediate energy savings $10-25 monthly from stopping cold air leakage pays back repair cost in 8-20 months.
Q: Can I replace a refrigerator door seal myself? A: DIY refrigerator gasket replacement is possible but challenging with moderate success rates: You CAN DIY if: Mechanically inclined with appliance repair experience, have correct replacement gasket verified by model number, comfortable with 2-4 hour project, can follow detailed instructions precisely, have patience for proper gasket softening and installation. DIY process overview: Order exact OEM gasket for your model, soak new gasket in warm water 10-15 minutes making pliable, remove old gasket carefully from retainer channel noting installation method, clean gasket channel thoroughly removing residue and debris, install new gasket starting at top center working outward and downward, ensure even seating in entire channel without twists or gaps, close door carefully checking for even seal contact, and wait 24 hours before heavy use allowing gasket to settle and conform. Common DIY problems: Wrong gasket ordered (hundreds of variations even within same brand), gasket too stiff during installation causing tears or improper seating, retainer channel damage during old gasket removal, gasket twisting or bunching in corners creating gaps, door alignment issues preventing proper seal even with new gasket, and time investment vastly exceeding estimates (first-timers often 3-5 hours). Professional advantages: Correct part sourcing eliminating trial-and-error, specialized installation techniques for even seating, door alignment included in service, gasket conditioning methods for perfect fit, immediate retry if issues arise (vs waiting days for replacement part), and warranty coverage on parts and labor. Success rates: DIY gasket replacement succeeds 60-70% of attempts by capable homeowners, 30-40% require professional correction fix installation errors. When professional required: Premium brands with complex gasket systems, French door models with multiple gaskets, integrated handle designs, misaligned doors needing adjustment beyond gasket replacement, and warranty-covered refrigerators where DIY voids coverage. Professional installation from JK Appliances ensures first-time success, proper seal performance, and eliminates trial-and-error process saving both time and money.
Q: Why does my refrigerator door not close properly? A: Multiple causes prevent proper refrigerator door closure: Weight and balance issues: Overloaded door shelves (milk, juice, condiments) making door too heavy causing hinge strain, sagging, and incomplete closure—redistribute heavy items to interior shelves. Door shelves stored incorrectly preventing door from swinging fully closed (shelf rail not properly seated). Hinge problems: Worn door hinges from years of use losing tension and proper door support, especially top hinge bearing majority of door weight. Loose hinge screws allowing door to sag out of alignment. Damaged hinge pins or bushings preventing smooth door operation. Levelness issues: Refrigerator not level front-to-back or side-to-side affecting door swing—unlevel refrigerators cause door to drift open (use level on top, adjust front leveling feet until slightly higher in front allowing door to swing closed naturally). Floor unevenness under refrigerator. Physical obstructions: Food items inside refrigerator blocking door closure (protruding containers, deli drawer not fully closed, vegetable crisper rails misaligned). Ice buildup in freezer door area on frost-free models indicating defrost system failure. Gasket and seal issues: Swollen door gasket from moisture or heat preventing door fitting flush with frame. Warped gasket creating high spots that prevent closure. Debris (food particles, sticky residue) in gasket preventing compression. Structural problems: Damaged or bent door frame from impact. Warped refrigerator cabinet from moving or impact. Broken door latch or strike plate. Diagnosis: Remove all door shelf items testing if door closes properly (indicates weight issue). Check refrigerator level with bubble level. Inspect for obvious obstructions. Test gasket flexibility and condition. Professional refrigerator door service includes hinge replacement, frame realignment, gasket replacement, and leveling adjustment restoring proper door closure and seal.
Q: How long do refrigerator door seals last? A: Refrigerator door gasket lifespan varies significantly by usage and care: Average lifespan 8-12 years with proper maintenance under normal operating conditions. Regular monthly cleaning with mild soap, avoiding door slamming, keeping gaskets free of food debris and sticky residue, and maintaining moderate door shelf weight extends life toward upper range. Factors reducing gasket life: Harsh cleaning chemicals (bleach, abrasives) deteriorating rubber, extreme temperature exposure (garage refrigerators in Toronto summer heat or winter cold experiencing 5-7 year life instead of 8-12), frequent door slamming stressing gasket and weakening magnetic attachment, overloaded door shelves causing constant stress, high humidity environments accelerating mold and rubber deterioration, and manufacturing quality variations between brands. Brand differences: Premium brands (Miele, Sub-Zero) often use superior gasket materials lasting 10-15 years. Standard brands (Whirlpool, GE, Frigidaire) average 8-10 years. Budget models may see 5-8 year gasket life. Environmental impact: Refrigerators in climate-controlled spaces (basements maintaining 65-70°F year-round) experience longest gasket life. Units in garages or unheated areas face temperature extremes Toronto winters dropping below freezing, summers exceeding 90°F in garage spaces causing rubber hardening, cracking, and premature failure. Signs of gasket aging: Hardening (rubber loses flexibility), cracks appearing in folds or corners, compressed areas not returning to original shape after bending, weakening magnetic hold, visible discoloration or deterioration, and mold/mildew resisting cleaning efforts. Maintenance extending life: Monthly cleaning with warm soapy water, thin petroleum jelly application quarterly maintaining flexibility, immediate attention to tears or damage preventing spread, and professional annual inspection catching problems early. Budget for gasket replacement every 8-10 years on standard refrigerators as planned maintenance rather than emergency expense. Contact JK Appliances for gasket condition assessment during routine maintenance visits.
Q: Will a bad door seal make my refrigerator run constantly? A: Absolutely—failed door seals are major cause of refrigerators running constantly: Cold air escaping through gaps forces compressor to run continuously attempting to maintain set temperature it can never achieve. Typical impact: Refrigerator with good seal runs 30-90 minute cycles then rests 15-30 minutes. Refrigerator with bad seal runs 80-90% of time with minimal rest periods. Compressor overwork from constant operation: Increases electricity consumption 25-50% above normal costing Toronto homeowners $15-40 monthly in excess electricity ($180-480 annually), dramatically shortens compressor lifespan from typical 12-15 years to 6-8 years (compressor replacement $600-1200), generates excessive heat from continuous operation, produces louder operation noise, and creates temperature fluctuations despite continuous running. Secondary effects: Warm humid air constantly entering through gaps causes frost buildup on freezer walls even in frost-free models (defrost system overwhelmed), condensation forming inside refrigerator and on door exterior, food temperature fluctuations causing premature spoilage (dairy products especially sensitive), and ice cream staying soft in freezer indicating inadequate cooling despite constant compressor operation. Cost analysis: $200 gasket replacement vs $15-40 monthly energy waste = 5-13 month payback period, plus avoiding premature compressor failure, food loss prevention, and improved food safety. Diagnosis confirming seal-caused continuous running: Perform dollar bill test around entire door perimeter—if bill slides out easily anywhere, seal failing. Listen for compressor—should cycle off occasionally; if runs continuously 2+ hours suggests problem. Check electricity meter spin rate or smart meter—compare refrigerator-only usage to manufacturer specifications (typically 100-800W depending on size/type). Feel around door edges when compressor running—cold air escaping confirms seal failure. Professional JK Appliances diagnosis includes thermal imaging showing exact leak locations and amperage testing confirming if compressor drawing excessive power from overwork. Immediate gasket replacement stops energy waste, prevents compressor damage, and restores proper refrigeration performance.
Q: Can dirty door seals cause frost buildup in my freezer? A: Yes, dirty or damaged seals are leading cause of freezer frost buildup in frost-free models: When warm humid Toronto air enters through door seal gaps, moisture condenses on cold freezer surfaces and freezes forming thick frost layers. Normal frost-free process: Freezer maintains 0°F (-18°C), automatic defrost cycles every 8-12 hours briefly warming evaporator coils melting accumulated frost, melted water drains through tube to evaporation pan. Seal failure overwhelms defrost system: Continuous warm air infiltration from gaps creates moisture faster than defrost cycles can manage, frost accumulates progressively on freezer back wall, evaporator coils, and throughout freezer compartment, thick frost (1/4 inch+) insulates evaporator coils reducing cooling efficiency creating vicious cycle, and eventually frost blocks air vents preventing cold air circulation to refrigerator section (causing refrigerator warm, freezer cold symptoms). Dirty seal mechanisms: Food debris, sticky residue, and grime prevent gasket from compressing evenly against frame creating microscopic to visible gaps, dirt attracts additional moisture accelerating frost formation, and debris prevents magnetic seal engagement allowing constant air infiltration. Statistics: Seal problems cause 60-70% of frost buildup cases in frost-free refrigerators, remaining 30-40% from actual defrost system component failures (heater, timer, thermostat). Resolution process: Clean gasket thoroughly with warm soapy water and toothbrush reaching folds, dry completely, test with dollar bill around entire door, apply thin petroleum jelly layer if gasket stiff, manual defrost if frost exceeds 1/4 inch thickness (unplug 6-8 hours, doors open, towels catching water), and replace gasket if cleaning doesn't restore seal. Prevention: Monthly gasket cleaning, quarterly dollar bill test, immediate attention to tears or damage, and avoid leaving freezer door open extended periods (every 30-second door opening introduces moisture equivalent to several hours of normal operation). If frost returns within 2-3 weeks after manual defrost and gasket cleaning, indicates defrost system failure requiring professional diagnosis and repair from JK Appliances Toronto.
Q: How can I temporarily fix a refrigerator door seal? A: Several temporary gasket repair methods buy time before permanent replacement: Deep cleaning (Resolves 40% of seal issues): Mix warm water with mild dish soap, wipe entire gasket removing food debris and sticky residue, use old toothbrush cleaning deep into folds and crevices, gently pull gasket from door cleaning underneath and in channel, rinse with clean damp cloth, dry thoroughly with soft towel, test seal with dollar bill test. Many "failing" seals actually just dirty preventing proper compression. Petroleum jelly application: After cleaning, apply thin layer of petroleum jelly working into rubber, wipe excess, restores flexibility to hardening gaskets, repeat monthly prolonging life, temporary solution—severely worn gaskets still need replacement. Hair dryer reshaping (For warped sections): Set dryer to low-medium heat, warm warped gasket sections evenly (don't overheat—damages rubber), gently mold into correct shape with fingers while warm, hold position while cooling, helps gaskets not lying flat against frame, CAUTION: excessive heat causes permanent damage. Door realignment: Check refrigerator level (place level on top, adjust front feet until slightly higher in front), tighten hinge screws (top hinge most critical), remove heavy items from door shelves reducing weight/stress, and verify no internal obstructions preventing door closure. Strategic gasket positioning: For small damaged section, rotate gasket moving damaged area to less critical location (center of bottom edge seals less critical than corners), creative solution for spot damage buying time. Magnet enhancement: Adhesive magnetic strips added behind gasket in weak magnetic areas temporarily improving hold, hardware store solution for weak magnetic seal. Limitations of temporary fixes: Don't address visible cracks, tears, or severe hardening, effectiveness decreases over time requiring repeated application, energy waste continues though reduced compared to no fix, and food safety risk remains from incomplete sealing. Replacement timeline: If temporary fixes maintain seal 3-6 months, consider permanent gasket replacement soon. If fixes fail within days/weeks, immediate replacement crucial. Professional assessment from JK Appliances determines if temporary measures appropriate or immediate replacement necessary preventing food loss and energy waste.
Q: What is the best way to clean refrigerator door seals? A: Proper refrigerator gasket cleaning maintains seal performance and extends life: Monthly cleaning routine: Mix warm water (not hot—damages rubber) with few drops mild dish soap, wipe entire gasket surface with soft cloth or sponge, use old toothbrush cleaning deep into folds where mold/mildew collect, gently pull gasket away from door cleaning underneath and in mounting channel removing hidden debris, rinse thoroughly with clean damp cloth removing all soap residue (soap residue attracts dirt), dry completely with soft towel, wait 10 minutes before closing door allowing complete drying. Deep cleaning for problem areas: Baking soda paste (3 parts baking soda, 1 part water) for stubborn stains and odors—gentle abrasive safe for rubber, white vinegar solution (1:1 vinegar:water) for mold and mildew—natural antifungal properties, hydrogen peroxide (3% solution) for severe mold—let sit 5 minutes then wipe clean, and toothpick or skewer carefully removing debris from deep crevices (avoid sharp objects that tear rubber). What NOT to use: Harsh chemicals (bleach, ammonia, strong degreasers) deteriorate rubber causing premature failure, abrasive cleaners or scouring pads scratching and damaging gasket surface, excessive water soaking gasket's magnetic core affecting magnetic seal strength, and high heat or steam cleaners melting or warping gasket. After cleaning maintenance: Apply thin coat petroleum jelly quarterly maintaining flexibility especially in Toronto's dry winter months, inspect for early damage signs (small cracks, tears, hardening), perform dollar bill test verifying seal after cleaning, and address any problems immediately before worsening. Frequency recommendations: Quick wipe weekly during grocery unpacking, thorough cleaning monthly, deep cleaning quarterly or when visible dirt/mold accumulates, and professional evaluation annually during routine refrigerator maintenance. Pro tips: Clean gasket same day as refrigerator interior deep cleaning for comprehensive appliance hygiene, establish routine making cleaning habitual rather than emergency response to visible grime, involve family teaching gentle door closing and importance of gasket care, and document cleaning dates tracking maintenance schedule. Proper gasket cleaning extends life from average 8 years to 10-12+ years saving $150-300 replacement costs and maintaining energy efficiency preventing $10-25 monthly energy waste.
Q: Are universal refrigerator gaskets as good as OEM? A: OEM versus universal gaskets each have advantages depending on situation: OEM (Original Equipment Manufacturer) gaskets $75-200: Perfect fit guaranteed matching exact specifications, same quality as original factory installation, proper magnetic strength and seal compression, maintains manufacturer warranty if still applicable, ideal for refrigerators under 5 years old still under warranty, and best choice for premium brands (Miele, Sub-Zero, Viking, Thermador) where precision matters. OEM advantages: Exact mounting channel dimensions, perfect corner radiuses, correct magnetic strip placement and strength, proper rubber compound matching original durability, and long-term reliability. OEM disadvantages: Higher cost, sometimes require special order (3-7 day wait for uncommon models), brand-specific purchasing (can only get from manufacturer or authorized dealers). Universal gaskets $30-80: Trimmed to length for approximate fit, magnetic strip added for seal adhesion, work for many standard-size refrigerators, budget-friendly option, and available immediately at hardware stores. Universal advantages: Cost savings 50-70% vs OEM, immediately available, work acceptably for older refrigerators (8+ years) past warranty where exact fit less critical. Universal disadvantages: May leave small gaps not sealing perfectly, corners often problematic requiring creative trimming, magnetic strength sometimes weaker than OEM, shorter lifespan typically (5-7 years vs 8-12 for OEM), increased risk of installation issues, and potential energy waste from imperfect seal. Decision matrix: Use OEM for refrigerators under 10 years, premium/high-end brands, warranty coverage situations, and when perfect seal critical for energy efficiency. Use quality universal for budget situations, refrigerators 10+ years old approaching replacement, temporary solutions, and when immediate availability crucial. Third option—Quality aftermarket: Some aftermarket manufacturers produce brand-specific gaskets matching OEM quality at 20-40% lower cost—best of both worlds if available for your model. Professional JK Appliances technicians stock both OEM and premium aftermarket gaskets, recommend appropriate option for your specific refrigerator age/value/usage, and ensure proper installation regardless of gasket type chosen. Ask about our gasket options during service call for transparent comparison helping you make informed decision.\n\nQ: What Toronto areas does JK Appliances service for door seal repair?\nA: JK Appliances provides comprehensive refrigerator door seal service throughout Greater Toronto Area ensuring same-day emergency response availability: Toronto core: Downtown Toronto (Financial District, Entertainment District, Harbourfront), North York (Willowdale, Don Mills, Thornhill borders), Scarborough (Agincourt, Malvern, Rouge, Scarborough Village), Etobicoke (Islington, Rexdale, Mimico, Humber Bay), East York, York, Old Toronto neighborhoods. Mississauga and Peel: Mississauga complete coverage (Port Credit, Streetsville, Meadowvale, Erin Mills, Cooksville, Malton), Brampton all neighborhoods (Bramalea, Heart Lake, Springdale, Sandalwood, Queen Street corridor), Caledon select areas. York Region: Vaughan (Woodbridge, Concord, Maple, Thornhill), Richmond Hill (Oak Ridges, Bayview Hill), Markham (Unionville, Cornell, Markham Village, Box Grove), Aurora, Newmarket, King City select areas. Durham Region: Ajax, Pickering, Whitby, Oshawa providing comprehensive appliance repair services. Halton Region: Oakville (Glen Abbey, Old Oakville, Bronte), Burlington (Aldershot, Downtown Burlington, Nelson), Milton select areas. Service response times: Emergency priority service within 2-4 hours for food safety critical situations (refrigerator not sealing, temperature above 40°F, full refrigerator at risk), same-day service standard appointments 4-8 hour windows, next-day service for non-emergency situations, and weekend/evening emergency service available throughout coverage area. Coverage radius: Comprehensive service within 40km Toronto downtown core, select service extending 60km for established customers, and commercial accounts custom service agreements available. Specialty services: Multi-unit building contracts (condos, apartments), commercial refrigeration gasket services (restaurants, grocery stores), property management preferred vendor programs, and fleet service for property management companies. Call +1 (647) 560-8966 for appointment scheduling, immediate emergency dispatch, and service area confirmation for your specific location.
Q: Does JK Appliances warranty gasket replacements? A: Yes, JK Appliances provides comprehensive warranty coverage on all refrigerator door seal replacements ensuring customer satisfaction and repair reliability: Standard repair warranty: 90-day parts and labor warranty on all gasket replacements covering defects in parts or installation workmanship. If gasket fails or seal problems recur within 90 days, we return at no additional cost fixing issue completely. Warranty coverage includes: Gasket material defects (cracks, tears, hardening not from abuse or aging), installation issues (improper seating, retainer channel problems, corners not sealing), door alignment problems not identified during initial service affecting seal performance, and any reasonable callbacks ensuring proper seal function. Warranty exclusions: Damage from customer misuse (door slamming, harsh chemicals, physical damage), problems from refrigerator itself (compressor failure, power issues) unrelated to gasket, normal wear and aging beyond warranty period, and damage from environmental extremes (fire, flood, refrigerator tipping). Parts quality guarantee: We use OEM gaskets or premium aftermarket equivalents meeting or exceeding original specifications. Never compromise quality with inferior parts risking seal failure. All parts sourced from authorized distributors with manufacturer backing. Installation guarantee: Our certified technicians have 15+ years specialization in refrigerator repairs ensuring professional installation using proper techniques, tools, and testing. Post-installation verification includes dollar bill test around entire door perimeter, visual inspection confirming even gasket seating, door alignment check and adjustment if needed, temperature verification ensuring proper cooling restoration, and customer walkthrough of proper door closing and gasket care. Extended warranty options: Ask about extended service agreements for comprehensive coverage beyond standard 90-day warranty. Commercial accounts and multi-unit properties eligible for custom warranty programs. Comparison to DIY: DIY gasket replacement has zero warranty—if installation fails or wrong part ordered, customer bears full cost of retry. Professional installation's warranty coverage provides peace of mind and guaranteed results. Claiming warranty service: Simply call our service line identifying appointment and issue, no hassle process with rapid response, bring service records or invoice number for quick verification, and priority scheduling for warranty callback visits. Customer satisfaction: Our 90-day warranty reflects confidence in our work quality and commitment to customer satisfaction. We stand behind every repair ensuring your refrigerator door seals properly, operates efficiently, and saves energy as promised. Contact +1 (647) 560-8966 with any warranty questions or to schedule service—our team ensures your complete satisfaction with every refrigerator door seal repair across Greater Toronto Area.
Real Toronto Customer Example
"An Etobicoke couple noticed their Whirlpool refrigerator running constantly and their hydro bill jumped $40/month. They assumed the compressor was dying and were shopping for replacements. Our technician found the bottom seal completely split, leaking cold air. After gasket replacement ($190), energy bills normalized. The repair paid for itself in 5 months of savings." - JK Appliances, October 2024
Toronto & GTA Service Areas {#service-areas}
JK Appliances provides refrigerator door seal repair across the Greater Toronto Area:
Toronto (Primary Service Area)
Peel Region
York Region
Durham & Halton
Get Your Door Seal Fixed Today
A properly sealing refrigerator door saves energy, extends appliance life, and keeps your food fresh. JK Appliances offers professional door seal diagnosis and replacement.
Why Choose JK Appliances
- ✅ Same-day service across the GTA
- ✅ OEM and quality aftermarket gaskets available
- ✅ 90-day warranty on all repairs
- ✅ Upfront pricing - no hidden fees
- ✅ All major brands serviced
Contact Us Now
- Book Online: Schedule Your Repair
- Call: +1 (647) 560-8966
- Email: services@jkappliances.ca
Related Articles
- Refrigerator Compressor Not Working: Complete Guide
- Refrigerator Too Warm: Troubleshooting Guide
- Refrigerator Control Panel Problems
- Why Your Refrigerator is Running Constantly
- Refrigerator Making Unusual Noises
- Refrigerator Not Defrosting: Frost Buildup Solutions
- Freezer Too Cold: Temperature Issues Guide
Last updated: December 2025 | JK Appliances - Toronto's Trusted Appliance Repair Service
Expert Tips & Pro Insights
💡 Pro Tip: Regular maintenance can prevent 80% of appliance problems. Follow manufacturer guidelines for cleaning and care.
⚠️ Safety Warning: Always disconnect power before attempting any repairs or inspections. If you smell gas, evacuate immediately and call emergency services.
🔧 Technician Insight: Many issues that seem complex often have simple solutions. Start with basic troubleshooting before assuming the worst.
📞 When to Call a Professional: If you encounter electrical components, gas lines, refrigerant systems, or if basic troubleshooting doesn't resolve the issue, it's time to call an expert.
![Refrigerator Compressor Not Working? Complete Repair Guide for Toronto Homeowners [2025]](/images/blog/refrigerator/fridge_compressor_1765552159517.png)
