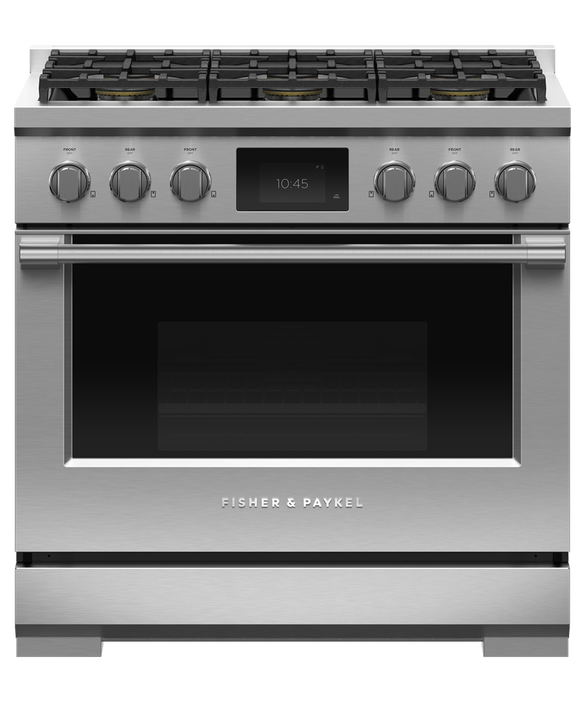
Stove Temperature Control Problems? Gas Stove Repair Toronto
Proper temperature control is essential for effective cooking on your gas stove. When temperature regulation fails, it can lead to burnt food, uneven cooking, and frustrating culinary experiences. This comprehensive guide covers common temperature control issues, their causes, and solutions to restore precise flame adjustment on your gas stove.
Understanding Gas Stove Temperature Control
TEMPERATURE CONTROL COMPONENTS
Control valves: Regulate gas flow to burners Control knobs: User interface for flame adjustment Gas orifices: Control gas volume and pressure Air shutters: Adjust air-to-gas mixture Pressure regulators: Maintain consistent gas pressure
HOW TEMPERATURE CONTROL WORKS
- Control knob adjusts valve opening
- Gas valve modulates gas flow
- Gas orifice meters precise gas amount
- Air mixture combines with gas for combustion
- Flame size corresponds to heat output
FLAME CHARACTERISTICS
High heat: Large, blue flames with defined inner cones Medium heat: Moderate flames, stable and blue Low heat (simmer): Small, steady flames without lifting Proper combustion: Blue flames with minimal yellow tips
Common Temperature Control Problems
INABILITY TO ACHIEVE LOW HEAT
Minimum Flame Too High
Causes:
- Incorrect gas valve adjustment
- Worn valve components
- Improper air shutter setting
- Gas pressure too high
Symptoms:
- Cannot achieve gentle simmer
- Food burns on lowest setting
- Flames won't reduce below medium
- Difficulty with delicate cooking
Flame Lifting or Blowing Out
Causes:
- Excessive air mixture
- Improper burner design
- Ventilation issues
- Gas pressure irregularities
Symptoms:
- Flames lift off burner ports
- Frequent flame extinguishing
- Unstable flame pattern
- Difficulty maintaining low heat
POOR HIGH HEAT PERFORMANCE
Maximum Heat Insufficient
Causes:
- Partially blocked gas orifice
- Low gas pressure
- Worn gas valve
- Incorrect burner sizing
Symptoms:
- Slow heating times
- Inadequate boiling performance
- Weak flame appearance
- Poor cooking efficiency
Uneven Heat Distribution
Causes:
- Clogged burner ports
- Damaged burner head
- Incorrect air adjustment
- Warped burner components
Symptoms:
- Hot spots in cookware
- Uneven cooking results
- Flame pattern irregularities
- Inconsistent heat zones
ERRATIC TEMPERATURE RESPONSE
Delayed Response to Adjustments
Causes:
- Worn control valve
- Sticky valve mechanism
- Control linkage problems
- Gas line restrictions
Symptoms:
- Slow flame adjustment
- Delayed heat changes
- Inconsistent response
- Control lag time
Temperature Fluctuations
Causes:
- Gas pressure variations
- Faulty pressure regulator
- Supply line issues
- Control valve instability
Symptoms:
- Flames vary without adjustment
- Cooking temperature changes
- Inconsistent performance
- Unpredictable heat output
Diagnostic Procedures
INITIAL ASSESSMENT
Visual Inspection
Control knobs: Check for proper alignment and smooth operation Flame patterns: Observe flame size, color, and stability Burner components: Look for damage, wear, or blockages Gas connections: Inspect for leaks or loose fittings
Operational Testing
- Test each heat setting from high to low
- Observe flame response to adjustments
- Check minimum and maximum flame sizes
- Note any irregular behavior or sounds
SYSTEMATIC TESTING
Flame Quality Assessment
High heat test:
- Flames should be large and blue
- Inner cones clearly defined
- No yellow tips or lifting
- Stable and consistent pattern
Low heat test:
- Small, steady flames
- No lifting or blowing out
- Consistent around burner
- Responsive to fine adjustments
Control Valve Testing
- Turn knob slowly through full range
- Check for smooth operation
- Verify complete shutoff
- Test fine adjustment capability
Gas Pressure Evaluation
Professional testing required:
- Inlet pressure measurement
- Manifold pressure testing
- Pressure drop analysis
- Regulator performance check
COMPONENT INSPECTION
Gas Valve Examination
External inspection:
- Control shaft alignment
- Valve body condition
- Connection integrity
- Mounting security
Operational check:
- Smooth knob rotation
- Positive detent positions
- Complete gas shutoff
- Proportional flow control
Burner Assembly Review
Burner head condition:
- Port cleanliness and size
- Surface flatness
- Crack or damage inspection
- Proper seating
Air shutter position:
- Opening size and adjustment
- Mechanism operation
- Locking capability
- Proper alignment
DIY Troubleshooting Solutions
CLEANING AND MAINTENANCE
Burner Port Cleaning
- Remove burner grates and caps
- Lift out burner heads
- Clean ports with thin wire or needle
- Use compressed air to clear debris
- Reassemble ensuring proper alignment
Control Valve Cleaning
External cleaning:
- Remove control knobs
- Clean valve stems with appropriate cleaner
- Lubricate if manufacturer recommends
- Reinstall knobs with proper alignment
Air Shutter Adjustment
- Locate air shutter on burner tube
- Loosen adjustment screw
- Adjust opening for proper flame
- Tighten screw to secure position
- Test flame quality at all settings
BASIC ADJUSTMENTS
Minimum Flame Adjustment
For adjustable valves:
- Remove control knob
- Locate adjustment screw
- Turn screw to reduce minimum flame
- Test simmer capability
- Reinstall knob and test
Burner Alignment
Proper positioning:
- Burner head sits level and centered
- Igniter positioned correctly
- No gaps between components
- Stable mounting
Control Knob Calibration
Alignment check:
- OFF position stops gas flow completely
- LITE position allows ignition
- Settings correspond to flame sizes
- Smooth operation through range
SIMPLE REPAIRS
Control Knob Replacement
- Pull off old knob
- Check valve stem condition
- Install new knob with proper fit
- Test operation and alignment
Burner Component Replacement
When to replace:
- Cracked or damaged burner heads
- Worn or warped burner caps
- Corroded or damaged components
- Poor fit or alignment issues
Professional Repair Requirements
WHEN TO CALL PROFESSIONALS
Gas System Modifications
- Pressure regulator adjustment or replacement
- Gas valve internal repairs
- Supply line pressure issues
- Safety system modifications
Complex Control Issues
- Electronic control problems
- Thermostat calibration
- Multiple component failures
- Precision adjustments required
Safety-Related Repairs
- Gas leak detection and repair
- Combustion safety issues
- Ventilation requirements
- Code compliance matters
PROFESSIONAL REPAIR PROCESS
Comprehensive Diagnosis
- Gas pressure testing throughout system
- Control valve internal inspection
- Combustion analysis for safety
- System performance evaluation
Precision Adjustments
Gas valve calibration:
- Internal adjustment procedures
- Pressure testing and verification
- Safety system integration
- Performance optimization
Burner optimization:
- Air-to-gas ratio adjustment
- Flame pattern optimization
- Heat output calibration
- Efficiency maximization
Quality Assurance
- Complete functional testing
- Safety verification procedures
- Performance benchmarking
- Customer training on proper operation
Brand-Specific Considerations
WHIRLPOOL/KITCHENAID
Control characteristics: Precise adjustment capabilities Common issues: Valve wear, control knob problems Repair approach: OEM parts recommended Adjustment procedures: Specific calibration requirements
GE/HOTPOINT
Control characteristics: Robust valve design Common issues: Air shutter problems, port clogging Repair approach: Generally straightforward Adjustment procedures: Standard industry practices
FRIGIDAIRE/ELECTROLUX
Control characteristics: Sealed burner systems Common issues: Control valve complexity Repair approach: Specialized knowledge required Adjustment procedures: Manufacturer-specific methods
SAMSUNG/LG
Control characteristics: Electronic integration Common issues: Control module problems Repair approach: Advanced diagnostic equipment Adjustment procedures: Computer-controlled systems
BOSCH/THERMADOR
Control characteristics: Precision German engineering Common issues: High-precision component wear Repair approach: Specialized parts and expertise Adjustment procedures: Exact specifications required
Safety Considerations
GAS SAFETY PROTOCOLS
Before adjustments:
- Turn off gas supply
- Ensure adequate ventilation
- Check for leaks after work
- Test all safety systems
COMBUSTION SAFETY
Proper flame characteristics:
- Blue flames indicate complete combustion
- Yellow flames may produce carbon monoxide
- Lifting flames create safety hazards
- Stable flames ensure efficient operation
VENTILATION REQUIREMENTS
Adequate airflow:
- Range hood operation during cooking
- Natural ventilation when possible
- Carbon monoxide detector installation
- Regular air quality monitoring
ADJUSTMENT LIMITATIONS
DIY boundaries:
- External adjustments only
- No internal valve modifications
- No gas pressure changes
- Professional help for complex issues
Preventive Maintenance
REGULAR MAINTENANCE SCHEDULE
Weekly: Clean spills, wipe surfaces Monthly: Deep clean burner components Quarterly: Check control operation, inspect connections Annually: Professional inspection and calibration
PROPER USAGE PRACTICES
Cookware selection: Use appropriate sizes for burners Heat settings: Use lowest effective temperature Cleaning habits: Clean spills immediately Gentle operation: Don't force controls
COMPONENT CARE
Control knobs: Keep clean and operate gently Burner ports: Prevent clogging with regular cleaning Air shutters: Check adjustment periodically Gas connections: Inspect for wear or damage
EARLY PROBLEM DETECTION
Warning signs:
- Changes in flame color or pattern
- Difficulty achieving desired temperatures
- Unusual sounds during operation
- Inconsistent cooking results
Cost Analysis
DIY MAINTENANCE COSTS
Cleaning supplies: $15-30 Basic tools: $25-50 Replacement knobs: $20-60 Burner components: $30-100
PROFESSIONAL REPAIR COSTS
Diagnostic service: $100-150 Control valve adjustment: $150-250 Valve replacement: $200-400 Complete burner service: $250-450
COST-BENEFIT CONSIDERATIONS
Repair vs. replacement:
- Age and condition of stove
- Frequency of problems
- Energy efficiency improvements
- Safety feature upgrades
Troubleshooting Quick Reference
HIGH HEAT PROBLEMS
Insufficient heat: Check gas pressure, clean orifices Uneven heating: Clean burner ports, check alignment Yellow flames: Adjust air shutter, clean components
LOW HEAT PROBLEMS
Can't achieve simmer: Adjust minimum flame setting Flames blow out: Reduce air mixture, check pressure Unstable flames: Clean ports, check burner position
CONTROL PROBLEMS
Sticky operation: Clean valve stem, lubricate if recommended Poor response: Check valve wear, inspect linkage No shutoff: Replace valve, check for damage
FAQ
Q: Why can't I get my gas stove to simmer properly? A: This usually indicates the minimum flame setting is too high. The gas valve may need adjustment, or the air shutter might need calibration for proper low-heat operation.
Q: What causes flames to be yellow instead of blue? A: Yellow flames typically result from insufficient air in the gas mixture. Adjust the air shutter or clean the burner ports to improve air flow.
Q: Why do my flames lift off the burner when I turn them down? A: Lifting flames usually indicate too much air in the mixture or gas pressure issues. Adjust the air shutter or have gas pressure checked.
Q: How often should I clean my gas burners for optimal temperature control? A: Clean burner surfaces weekly and perform thorough port cleaning monthly. Regular maintenance ensures consistent temperature control.
Q: Can I adjust the gas valve myself? A: Only external adjustments should be attempted by homeowners. Internal valve adjustments require professional service for safety and proper operation.
Q: What's the difference between a simmer and low heat setting? A: Simmer should maintain very small, stable flames for gentle cooking. Low heat is slightly higher but still allows for delicate temperature control.
Achieve perfect cooking temperatures every time! Contact JK Appliances for professional gas stove temperature control repair in Toronto. Our certified technicians can calibrate, adjust, and repair any temperature control issue. Call (647) 560-8966 for expert service that ensures precise cooking control!
