Fridge door seal replacement guide refers to a complete, step-by-step process to test, remove, and install a new refrigerator door gasket so cold air stays in, food stays safe at 37–40°F, and energy use drops. It includes prerequisites, tools, and troubleshooting so you can get a reliable, even seal around the door perimeter.
By JK Appliances • Last updated: 2026-04-19
Above the Fold: Hook, Summary, and Quick TOC
Use this fridge door seal replacement guide to quickly stop warm air leaks and cut food waste. Check the gasket with a dollar-bill test, remove the worn seal, clean the channel, and fit the new gasket corner-first. Finish by leveling the fridge and adjusting hinges for uniform compression.
Quick Answer
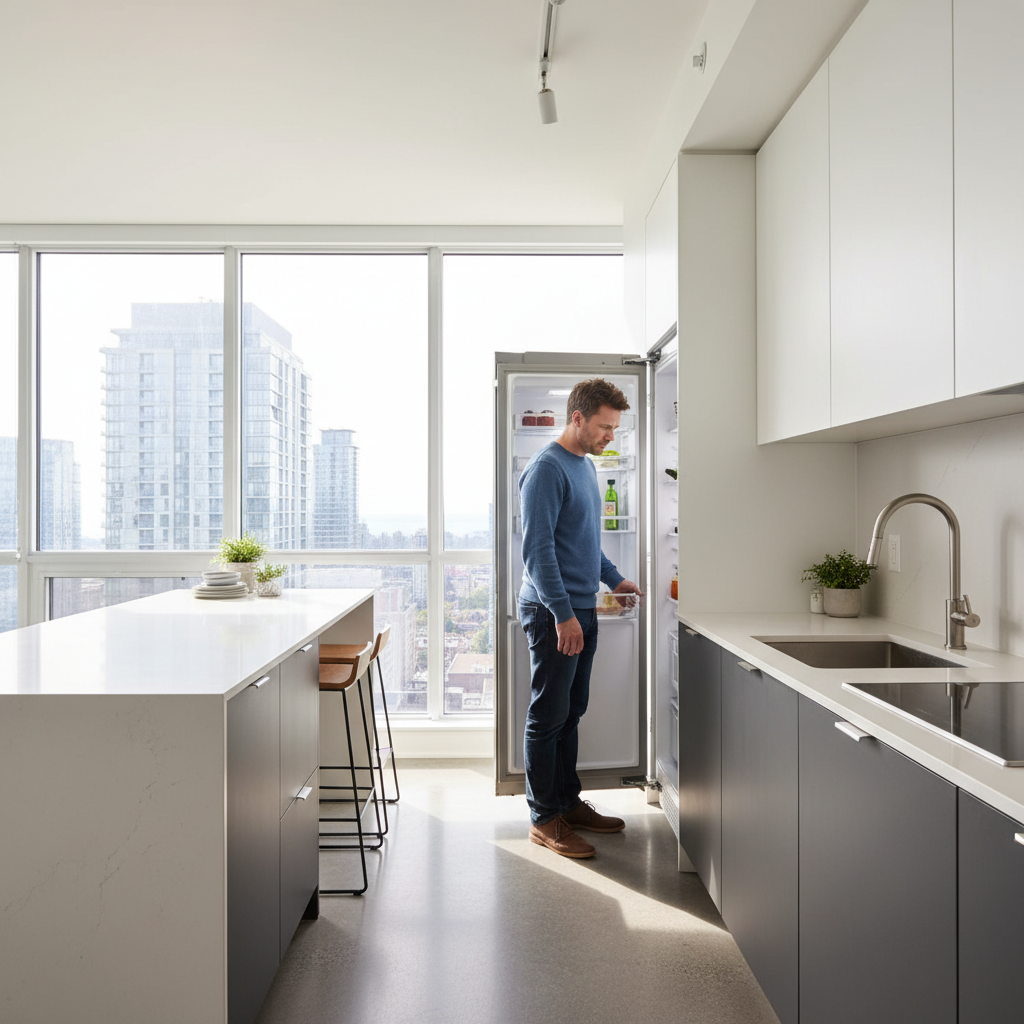
Replace a fridge door seal by confirming failure with the dollar-bill test, warming the new gasket, cleaning the door channel, then installing corner-first and checking for even grip. If you’re near 18 Yonge St #3509, JK Appliances offers same-day refrigerator repair across Toronto and the GTA with a 180-day warranty.
At a Glance
- What you’ll learn: What a gasket is, why it matters, how it works, and how to replace it step-by-step.
- Why it matters: Better food safety (keep 37–40°F), lower energy use, less frost and condensation.
- Time required: 30–60 minutes for most single-door fridges once parts are on hand.
- Skill level: Basic DIY with patience; call a pro if hinges or liners are damaged.
- When to call JK Appliances: If the door won’t align, liner is cracked, or the fridge still warms up after replacement.
Jump to: What Is It? • Why It Matters • How It Works • Prerequisites • Tools • Step-by-Step • Troubleshooting • Methods • Best Practices • Resources • Case Studies • FAQ • Conclusion
What Is a Fridge Door Seal (Gasket)?
A fridge door seal, or gasket, is a flexible magnetic rubber frame that runs around the door edge. It compresses against the cabinet to create an airtight barrier, preventing warm, humid air from entering and keeping cold, dry air inside to maintain safe food temperatures.
- Core function: Maintain an airtight barrier between your kitchen and the refrigerated compartment.
- Design details: Most modern gaskets include an embedded magnetic strip that helps the seal “grab” the frame.
- Materials: Flexible vinyl or rubber with hollow chambers to compress evenly at the corners and straight runs.
- Where it sits: Pressed into a groove (channel) on the door liner, sometimes secured with screws or hidden clips.
- Failure signs:
- Visible cracks, tears, or hardened “flat spots.”
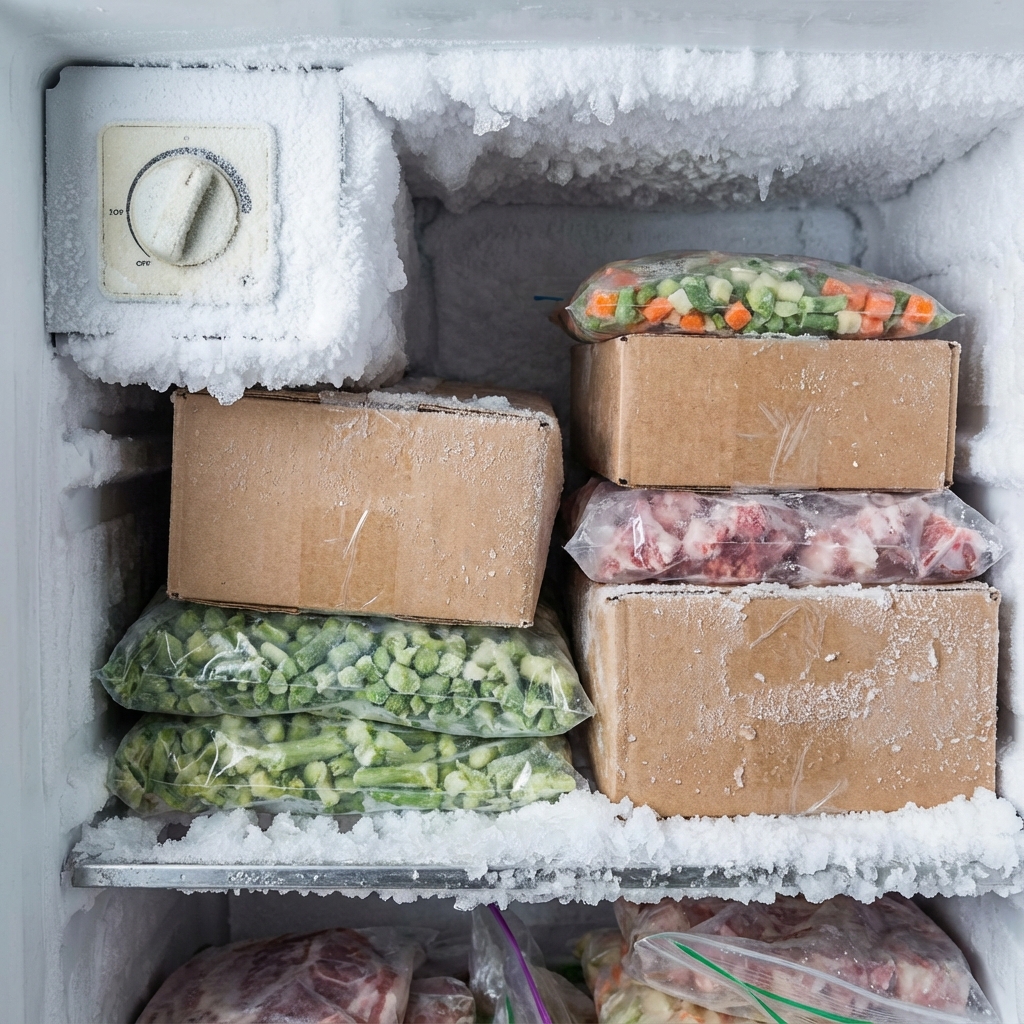
- Condensation or frost near the door edge.
- Door doesn’t “grab” or pops open after closing the freezer.
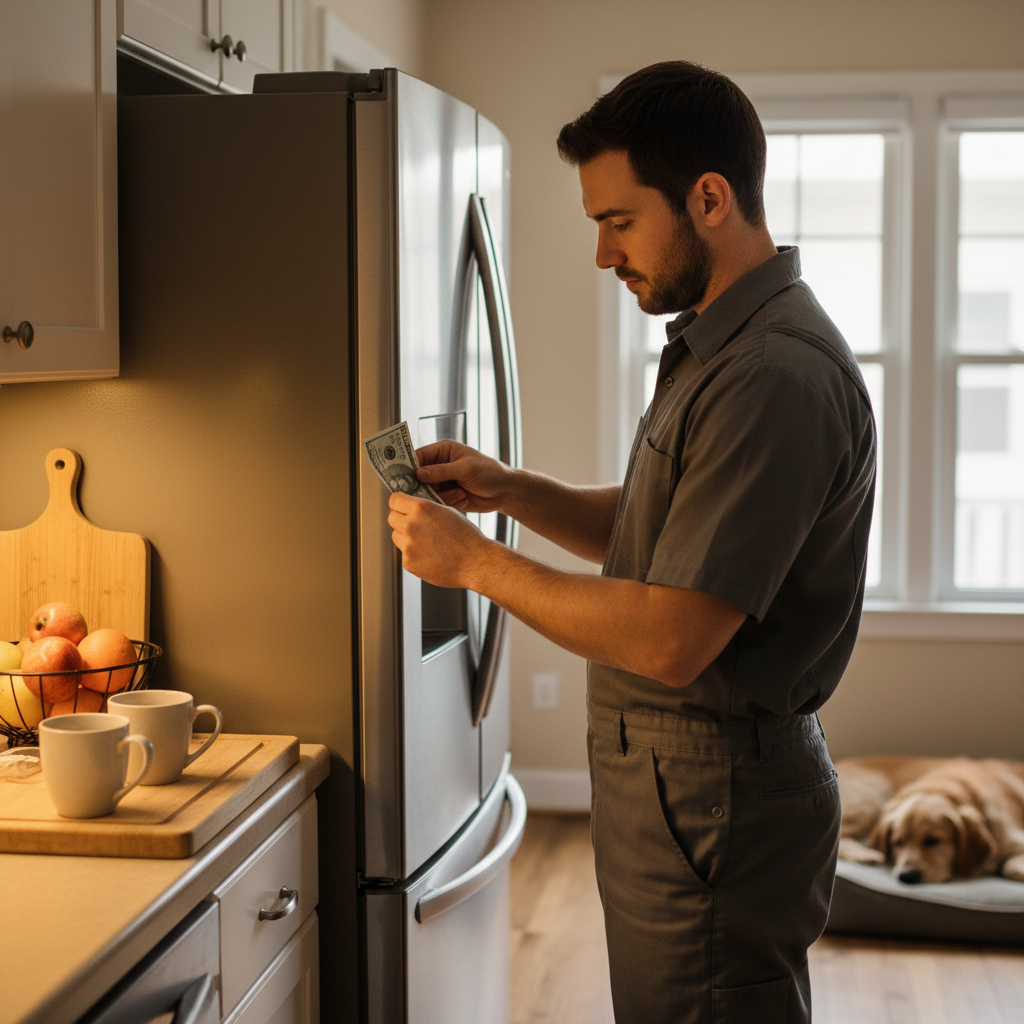
- Dollar-bill test fails (bill slides out with little resistance).
- Result of failure: Temperature drift, more compressor run time, and potential food safety risk if the cabinet warms above 40°F.
In our experience servicing thousands of refrigerators across Toronto and the GTA, gasket wear is a top-3 cause of poor cooling complaints and frost patterns along the liner. It’s simple to solve early and protects your food.
Common Gasket Profiles and Where You’ll Find Them
- Single-bulb: Basic profile common on top-freezer models; compresses easily.
- Double-bulb: Improved rebound and sealing on family-size French-door units.
- Fluted edges: Helps channel condensation away from the liner seam.
- Molded corners: Pre-shaped OEM corners that seat faster and resist gaps.
Here’s the thing: profile matters less than fit and alignment. Even the best gasket leaks when the door is out of square.
Why Fridge Door Seal Replacement Matters
Replacing a worn gasket restores safe temperatures (37–40°F) and reduces condensation, frost, and compressor strain. You’ll improve food safety, lower energy use, and avoid nuisance issues like doors popping open. It’s a high-impact, low-skill repair when the door and hinges are in good condition.
- Food safety first: The USDA Food Safety and Inspection Service advises refrigerators hold 40°F or below and freezers at 0°F to slow bacterial growth.
- Energy efficiency: A tight seal cuts infiltration of warm, humid air that triggers more compressor cycles.
- Humidity control: Less moisture ingress means fewer ice crystals on the liner and less fogging on glass shelves.
- Appliance longevity: Reduced cycling eases compressor wear and fan runtime.
- Everyday convenience: Doors close with a confident tug; no more surprise “ajar” alarms or soft ice cream.
- Local support: If you’re in a condo near 18 Yonge St #3509 or anywhere in the GTA, JK Appliances provides same-day refrigerator repair with a 180-day parts and labor warranty and a 90% first-visit fix rate.
According to USDA guidance, perishable food above 40°F for more than two hours should be discarded. That’s why a consistent seal is more than a comfort feature—it’s a safety measure.
Real-World Impacts You’ll Notice This Week
- Milk lasts longer: Stable 37–40°F reduces souring complaints.
- Less frost cleanup: Ice crystals on the inner liner or freezer lip diminish.
- Quieter cycles: Fewer starts and stops from the compressor and fans.
- Better ice production: Ice makers hit their expected cycles when the freezer holds 0°F.
We’ve seen families reclaim a surprising amount of weekly food waste simply by restoring a tight door seal and leveling the cabinet.
How a Refrigerator Gasket Works
A refrigerator gasket seals by combining soft, hollow rubber that compresses evenly with a slim magnetic strip that grips the steel cabinet. Correct hinge alignment and slight door tilt ensure uniform pressure so the gasket touches all around without gaps.
- Compression chambers: Hollow sections deform to fill micro-gaps as the door closes.
- Embedded magnet: A narrow magnetic strip adds holding force so the door resists rebound.
- Thermal dynamics: Warm, humid air raises dew point; the gasket prevents that influx, limiting frost and sweat.
- Hinge geometry: If hinges sag, the top or bottom corner loses pressure and leaks form.
- Leveling matters: Slight rearward tilt (front legs higher) helps the door settle into the seal naturally.
We’ve found that many “cooling issues” stem from small alignment errors that a new gasket can’t overcome alone. Leveling and hinge checks are as important as the rubber itself.
Brand-Specific Quirks Our Techs Watch For
- Samsung French-door: Center mullion flap must fold flat; check its hinge spring.
- LG bottom-freezer: Lower gasket corners harden first; warm and massage to shape.
- Whirlpool top-freezer: Screw-retained inner flap—snug, don’t crank, or the liner bows.
- GE side-by-side: Door cam risers wear; slight lift at the top hinge restores contact.
- Bosch built-in: Tight cabinetry clearances require precise leveling before sealing.
- Frigidaire classic: Push-in bead seats easily but corners need extra attention.
These patterns aren’t defects—they’re design nuances. Knowing them speeds up a clean install.
Prerequisites: What to Do Before You Start
Confirm the problem, source the correct OEM gasket by model number, gather tools, and warm both the room and the new seal. Photograph the existing corners and note any screws along the liner so you can reinstall to factory fit without guesswork.
- Confirm it’s the gasket:
- Perform the dollar-bill test at 12–16 points around the door.
- Look for cracks, tears, and hardened corners; check for liner warping.
- Rule out hinge sag by lifting the door gently—excess play signals adjustment needed.
- Get the right part:
- Find the model number on the inner liner, ceiling, or behind the crisper area.
- Order an OEM gasket for best fit. Universal gaskets can work but require trimming and careful heating.
- Prepare the workspace:
- Raise room temperature to comfortable levels to keep the rubber pliable.
- Clear the door shelves and remove heavy items to lighten the door.
- Unplug or switch off power at the panel if you’ll work near live wiring or lights.
- Photograph the corners: Capture how the OEM corners are mitered or molded; replicate that look.
- Time & help: Plan 30–60 minutes; a helper makes alignment easier on French-door and bottom-freezer models.
Safety Notes Before You Begin
- Avoid sharp tools: Metal blades can gouge liners and cut new seals—use plastic tools.
- Children and pets: Keep them clear; doors may swing freely during adjustments.
- Electrical safety: If you must remove light housings, disconnect power first.
- Gas ranges nearby: If your kitchen has open flame, keep heat guns away from burners; a hair dryer on low is best.
We treat every in-home visit with safety first. A careful setup prevents 90% of common mishaps during DIY gasket swaps.
Tools and Materials You’ll Need
You need a replacement gasket matched to your model, a hair dryer or warm water to soften rubber, mild cleaner, rags, a plastic putty knife, and a small screwdriver or nut driver. Optional blue painter’s tape helps hold corners while the seal “sets.”
- New door gasket (OEM recommended for Samsung, LG, Whirlpool, GE, Bosch, Maytag, KitchenAid, Electrolux, Miele, Frigidaire).
- Hair dryer or warm water bath (to relax shipping folds).
- Mild cleaner and isopropyl alcohol (final wipe of the channel).
- Soft rags or microfiber towels; cotton swabs for corners.
- Plastic putty knife or nylon trim tool (avoid metal on liners).
- Phillips screwdriver and nut driver set (common: 1/4 in, 5/16 in).
- Blue painter’s tape for temporary positioning.
- Non-hardening gasket adhesive (only if your OEM method specifies it).
- Small hex key for select hinge adjustments (varies by brand).
- Level to set a slight rear tilt (front feet higher).
Nice-to-Have Additions
- Infrared thermometer: Quick checks of liner temperature after install.
- Wireless fridge thermometer: Place one probe in the door bin, another mid-shelf.
- Soft-jaw pliers: For stubborn screw caps without marring finishes.
Tools don’t have to be fancy. Clean surfaces and patient hands are what make gaskets seal.
Fridge Door Seal Replacement Guide: Step-by-Step
Warm and relax the new gasket, remove the old one, clean the door channel, and install the new seal starting at the corners. Seat the bead fully, fasten any screws finger-tight then snug, and finish by leveling the fridge and testing grip around the full perimeter.
- Unload and open space: Remove door bins, jars, and tall items so the door is light and easy to handle.
- Soften the new gasket:
- Use a hair dryer on low or soak the gasket in warm (not boiling) water for 5–10 minutes.
- Lay flat and massage out kinks so it sits square.
- Power considerations: Switch off if the light switch or wiring is exposed; otherwise leave on to monitor temperature later.
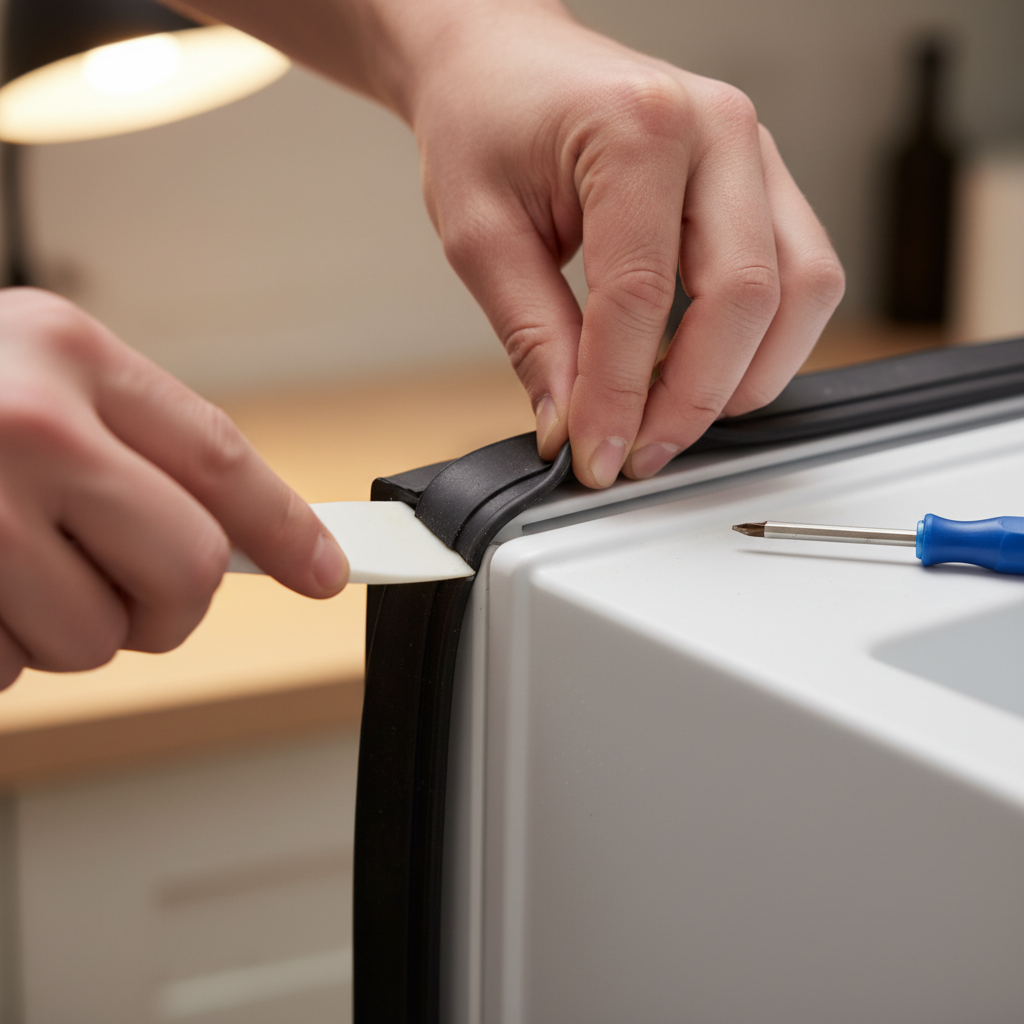
- Remove the old gasket:
- For push-in styles, lift the inner lip and pull the bead from the channel.
- For screw-retained styles, loosen perimeter screws under the inner flap (don’t fully remove unless required).
- For adhesive styles, gently pry with a plastic tool and roll off residue.
- Clean the channel thoroughly:
- Wipe with mild cleaner; finish with isopropyl alcohol for a grease-free surface.
- Ensure corners are clear; debris here causes gaps later.
- Dry-fit the new seal:
- Identify top, bottom, and magnet orientation. Many gaskets aren’t symmetrical.
- Confirm corner lengths align with the door size—no stretching to “make it fit.”
- Install corner-first:
- Seat the top-left corner fully, then the top-right, then bottom corners.
- Run along the straight sides last, pressing the bead uniformly into the channel.
- Secure per OEM method:
- Push-in: Work the bead with thumbs; avoid tools that cut.
- Screw-in: Start all screws finger-tight, then snug 1/8–1/4 turn—no over-torquing.
- Adhesive: Apply thin, continuous film where specified; tape corners while curing.
- Straighten wrinkles:
- Warm stubborn waves with a hair dryer and pull gently to relax.
- Hold shape with painter’s tape for 15–30 minutes.
- Level the fridge:
- Raise front feet slightly so the cabinet tilts back a few degrees.
- This helps the door settle and increases top-corner contact.
- Check hinge alignment:
- Close the door and inspect the reveal (gap) along the top and sides.
- Adjust hinges where the reveal is widest to even out compression.
- Perform the dollar-bill test:
- Insert a bill at many positions; you should feel consistent drag all around.
- Mark any loose spots for minor readjustment.
- Stabilize and monitor:
- Let the gasket “set” for an hour with the door closed (tape corners if needed).
- Verify compartment temperature holds 37–40°F over the next 12–24 hours.
- Reload thoughtfully: Reinstall bins, avoid overstuffing door shelves that can pry on the new gasket.
Temperature Verification Protocol
- Place two thermometers: One mid-shelf, one in a door bin.
- Record for 24 hours: Expect the door bin to read slightly higher; mid-shelf should stabilize at 37–40°F.
- Doors closed window: Avoid frequent checks during the first 4–6 hours—let the gasket “learn” its shape.
- Interpretation: If mid-shelf drifts above 40°F, recheck hinges, level, and seal contact at corners.
According to food safety guidance from the USDA, maintaining 40°F or below is essential to slow bacterial growth on perishables.
Troubleshooting After Installation
If the door won’t seal evenly, rewarm and reshape the gasket, level the cabinet, and adjust hinges. Use the dollar-bill test in multiple spots. Persistent gaps often trace to warped liners, hinge wear, or overstuffed bins rather than the gasket itself.
- Door won’t stay shut:
- Increase rear tilt; verify bottom hinge isn’t loose.
- Confirm the magnetic strip isn’t flipped or twisted in one section.
- Uneven gap along the top:
- Shim or adjust the top hinge; a 1–2 mm lift can restore compression.
- Warm and massage the top run to relax shipping waves.
- Condensation at the liner:
- Look for a small corner gap or debris under the bead.
- Reduce door openings while the gasket “trains” to shape.
- Frost forming near the door:
- Check freezer door alignment (on bottom-freezer units) which influences fridge pressure.
- Ensure the mullion flap on French-door models folds flat and seals.
- Temperature still high:
- Verify condenser coils are clean and fans are running.
- Inspect for air leaks at water or ice chute gaskets (if equipped).
- Noise increased after install:
- New seals can change airflow briefly; this normalizes within a day.
- If buzzing persists, confirm the door isn’t rubbing against cabinetry.
11 Quick Fixes Our Techs Use
- Warm and hand-shape stubborn corners for 60 seconds.
- Run a credit card under the lip to ensure the bead seated fully.
- Add a thin shim under the top hinge to lift a sagging corner.
- Tape the worst corner closed for 30–60 minutes while rubber sets.
- Move heavy gallon jugs off the door to reduce prying force.
- Check the center mullion latch alignment on French doors.
- Verify door reversal hardware isn’t binding the seal.
- Clean the cabinet face—grease film can defeat a good seal.
- Inspect the magnetic strip for kinks; smooth with warm hands.
- Set a slight rear tilt for self-close assistance.
- Re-test with the dollar-bill method at 12–16 points.
Types, Methods, and Approaches
Gaskets attach in three common ways: push-in beads, screw-retained lips, or adhesive-backed strips. OEM seals fit best. Universal gaskets can work with careful trimming and heat forming. Always set corners first and verify magnet orientation before securing the perimeter.
- Attachment styles:
- Push-in bead: Snaps into a molded channel; fastest to replace.
- Screw-retained: Inner flap hides screws that clamp the lip to the liner.
- Adhesive-backed: Requires clean, dry surfaces; cure time varies by adhesive.
- Seal profiles: Single-bulb, double-bulb, and fluted designs balance compression and rebound.
- OEM vs universal:
- OEM: Exact fit, correct magnet strength, molded corners.
- Universal: Flexible option but needs trimming, heat training, and more patience.
- Corner geometry: Molded corners are preferred; mitered joints must be clean and gap-free.
- Special cases:
- French-door: Align the flapper mullion and center seal carefully.
- Built-in units: Clearances are tighter; plan for more adjustment time.
Comparison Table: Gasket Attachment Methods
| Method | Install Difficulty | Typical Time | Notes |
|---|---|---|---|
| Push-in bead | Low | 20–40 min | Fastest; ensure bead fully seats in corners. |
| Screw-retained | Medium | 30–60 min | Don’t over-tighten; can warp liner edge. |
| Adhesive-backed | Medium–High | 45–90 min incl. cure | Surface prep is critical; tape corners during cure. |
OEM, Universal, and Aftermarket Compared
| Type | Fit Quality | Corner Style | When to Choose |
|---|---|---|---|
| OEM | Exact | Usually molded | Premium brands; fast, reliable install |
| Universal | Variable | Mitered | Older units; DIY with time for shaping |
| Aftermarket | Good–Fair | Mixed | When OEM unavailable; verify reviews |
Best Practices and Pro Tips
Train the rubber warm, set corners first, and keep screws just snug. Level the cabinet to tilt slightly back, then test with a dollar bill around the full perimeter. Give the gasket time to “remember” its new shape before reloading heavy door bins.
- Warm equals pliable: Work in a warm room or use a low hair dryer to relax the seal.
- Corner discipline: Perfect corners before running straight sections to avoid waves later.
- No stretching: Stretching thins rubber and weakens magnet alignment.
- Screw strategy: Start loose, align, then snug; check for liner bowing as you go.
- Leveling for success: Slight rear tilt helps the magnet engage and prevents pop-open issues.
- Wait period: Keep the door closed 30–60 minutes post-install; tape corners if needed.
- Verify temperatures: Aim for 37–40°F after 12–24 hours; freezer to 0°F.
- Protect the new seal: Wipe with mild soapy water monthly; avoid harsh solvents.
Need a Pro? We’re Nearby.
When hinges, liners, or door heaters complicate the job, it’s faster to call licensed techs. JK Appliances serves Toronto and the GTA with same-day appointments, a 90% first-visit fix rate, and a 180-day parts and labor warranty.
Common Mistakes to Avoid
- Over-tightening screws: Warps the liner edge and creates new leaks.
- Skipping the level step: Leaves a perfect gasket with imperfect contact.
- Installing cold: Stiff rubber won’t seat; warm it first.
- Loading heavy bins immediately: Can pull corners out of shape before they set.
We see these pitfalls weekly. A little patience saves a second round of adjustments.
Tools, Resources, and References
Match parts by model number, follow manufacturer service sheets, and use food safety and energy guidelines to validate results. Keep a thermometer inside the fridge to confirm 37–40°F performance after installation and alignment.
- Model lookup: Door liner label, user manual, or manufacturer website parts diagrams.
- Brand support: Samsung, LG, Whirlpool, GE, Bosch, Maytag, KitchenAid, Electrolux, Miele, and Frigidaire parts portals.
- Food safety: USDA Food Safety and Inspection Service guidance on 40°F refrigerator and 0°F freezer targets and the “2-hour rule.”
- Efficiency: ENERGY STAR refrigerator maintenance tips emphasize intact gaskets and clean coils.
- Local service: If temperatures won’t hold or gaps persist, JK Appliances can inspect hinges, liners, and cabinet square on the same day across the GTA.
According to ENERGY STAR guidance, door seals are a foundational check during routine maintenance because infiltration drives up runtime. It’s a small part with a big impact.
Case Studies and Local Examples
Common Toronto issues include hardened corners, sagging top hinges, and French-door center flapper misalignment. Proper leveling, OEM gaskets, and corner-first installs typically resolve leaks. When liners warp or hinges wear, professional adjustment is the fastest solution.
- Downtown condo near 18 Yonge St #3509:
- Symptom: Door popped open after closing the freezer.
- Fix: Level cabinet, replace worn fridge gasket, adjust center mullion flap; stable 38°F within 6 hours.
- Mississauga family kitchen (French-door):
- Symptom: Condensation beads on the right door edge.
- Fix: OEM right-door gasket, hinge shim of ~1 mm, dollar-bill test passed at all points.
- Richmond Hill rental (top-freezer):
- Symptom: Ice buildup on freezer lip and warm fridge.
- Fix: New freezer gasket, cleared air returns, verified fridge seal; restored 0°F/38°F overnight.
- Markham stainless French-door:
- Symptom: Uneven gap along top; door ajar alarm randomly.
- Fix: Gasket replacement plus upper hinge replacement; even compression and quiet operation.
- Brampton side-by-side:
- Symptom: Milk spoiling early; gasket looks fine.
- Fix: Found liner debris under bead; reseated push-in gasket; temps stabilized at 39°F.
- Vaughan built-in unit:
- Symptom: Persistent frost near top corner after DIY replacement.
- Fix: Precise leveling and top-hinge micro-adjustment; frost eliminated.
- Etobicoke rental turnover:
- Symptom: Dollar-bill passes easily on left side only.
- Fix: New universal gasket heat-trained to fit; passed 16-point bill test.
- Scarborough townhouse:
- Symptom: Door rubs cabinet; seal crimps at mid-height.
- Fix: Adjusted leveling feet and hinge cam; smooth close and full seal contact.
- North York condo:
- Symptom: Water droplets at liner after grocery day.
- Fix: Educated on door-open time; warmed and reshaped corners; condensation resolved.
- Downtown shared suite:
- Symptom: Fridge stable but freezer snowing at lip.
- Fix: Replaced freezer gasket and verified fridge seal; restored 0°F and reduced snow.
- Richmond Hill premium built-in:
- Symptom: Fine lines in gasket; temperature fine—yet door feels “loose.”
- Fix: Preemptive OEM gasket swap; stronger door “grab,” longer food life.
We’ve performed thousands of similar repairs across the GTA, and most resolve on the first visit when hinges and liners are sound.
Local Tips
- Tip 1: Condo hallways around 18 Yonge St #3509 can be cooler; bring the new gasket inside for an hour before installing so it’s pliable.
- Tip 2: During winter dry spells, static can attract dust to the seal. Wipe the gasket lip weekly to keep debris from creating micro-gaps.
- Tip 3: High-traffic kitchens near the waterfront see frequent door openings. Level the fridge slightly back to help the door “self-close” and maintain your new seal’s grip.
IMPORTANT: These tips reflect our on-site experience serving Toronto condo residents and homeowners who value fast, reliable outcomes.
Frequently Asked Questions
Replace a fridge gasket when it fails the dollar-bill test, shows cracks or flattening, or causes condensation and temperature drift. OEM parts fit best, and most installs take under an hour with basic tools and careful alignment.
How do I know my gasket is bad?
Look for cracks, tears, hardened corners, or a door that won’t “grab.” Do the dollar-bill test at multiple points. If the bill slides out easily anywhere, that section isn’t sealing. Frost along the liner or temperatures rising above 40°F are strong indicators, too.
Do I need to unplug the fridge to change the seal?
Not always. If you won’t expose wiring or remove liners, you can leave power on to monitor temperature after the install. If screws or lights are near your work area or children are present, unplug for safety and work briskly to limit warm-up.
Can I use a universal gasket?
Yes, but expect more effort. Universal gaskets often need trimming and heat forming. OEM parts usually provide molded corners, correct magnet strength, and a faster, cleaner fit. For premium brands, OEM is strongly recommended.
Why does the door pop open after I close the freezer?
On bottom-freezer units, pressure changes can nudge the fridge door. Proper leveling (front slightly higher) and a well-seated gasket prevent rebound. If it persists, adjust hinges and verify the center mullion flap closes fully on French-door models.
When should I call JK Appliances instead of DIY?
Call if the hinge is worn, the liner is warped or cracked, or the door won’t align after a careful install. Our licensed, TSSA-certified technicians provide same-day service across Toronto and the GTA, backed by a 180-day parts and labor warranty.
Conclusion and Next Steps
A well-fitted gasket, level cabinet, and aligned hinges restore cold, dry conditions that protect food and lower energy use. If gaps persist after careful installation and testing, professional hinge and liner assessment is the fastest path to a lasting fix.
- Key Takeaways
- Keep your fridge at 37–40°F and freezer at 0°F for safety.
- Install corner-first, warm the seal, and avoid stretching.
- Level the cabinet and adjust hinges for uniform compression.
- Validate with the dollar-bill test across the entire perimeter.
- Action Steps
- Source the correct OEM gasket by model number.
- Follow the step-by-step process and best practices above.
- Monitor temperatures for 12–24 hours post-install.
- If issues remain, book same-day service with licensed technicians.
Talk to a Local Tech
Prefer a sure thing? JK Appliances offers same-day refrigerator repair across Toronto and the GTA with a 90% first-visit fix rate and a 180-day parts and labor warranty. We service all major brands and back our work.
Related Topics
- Refrigerator hinge alignment and leveling basics
- How to reduce condensation and frost in modern fridges
- When to replace a freezer gasket versus defrost components
- Routine refrigerator maintenance that extends compressor life