Dishwasher Detergent Dispenser Not Working? Complete Repair Guide
When your dishwasher detergent dispenser won't open during the wash cycle, your dishes come out dirty and covered in residue. A malfunctioning soap dispenser is one of the most frustrating dishwasher problems, but fortunately, it's often fixable without professional help.
At JK Appliances Toronto, we've repaired thousands of dishwasher dispensers across the Greater Toronto Area. This guide covers everything from simple cleaning solutions to component replacements for all major brands.
Quick Answer: Is your dishwasher detergent dispenser stuck closed or not opening? Learn how to diagnose and fix dispenser problems for all major brands including Bosch, Samsung, LG, and Whirlpool. This is a common issue that can usually be resolved with proper troubleshooting. If the problem persists, professional diagnosis is recommended.
How Your Dishwasher Dispenser Works
Understanding the mechanism helps with troubleshooting:
Dispenser Components:
- Dispenser Door - Hinged cover that holds detergent
- Latch/Lock Mechanism - Keeps door closed until release
- Bi-Metal Release or Wax Motor - Activates at proper time
- Timer/Control Board - Signals when to open
- Spring Mechanism - Powers door open when released
The Cycle:
- You add detergent and close the dispenser door
- The latch engages and holds the door shut
- At the right point in the wash cycle, the control board signals the release
- The bi-metal strip heats up (or wax motor activates)
- The latch releases and the spring opens the door
- Detergent mixes with hot water and sprays throughout
Common Dispenser Problems
Problem 1: Door Stays Closed (Doesn't Open)
Symptoms: Detergent remains in dispenser; dishes dirty Possible Causes:
- Stuck latch mechanism
- Failed bi-metal/wax motor release
- Blocked door movement
- Control board issue
Problem 2: Door Won't Stay Closed
Symptoms: Detergent releases too early; poor cleaning Possible Causes:
- Worn latch
- Broken spring
- Damaged door
- Misaligned mechanism
Problem 3: Detergent Residue Left Behind
Symptoms: Some detergent remains; white residue on door Possible Causes:
- Low water temperature
- Blocked spray reaching dispenser
- Detergent clumping
- Partial door opening
Problem 4: Dispenser Makes Noise but Doesn't Open
Symptoms: Clicking sound but door stays shut Possible Causes:
- Jammed latch
- Weak wax motor
- Accumulated residue
Solution 1: Clean the Dispenser Thoroughly
Why It Works: Detergent residue, food debris, and mineral deposits often prevent proper operation.
Deep Cleaning Steps:
-
Open the dispenser door fully
- Check for any visible obstructions
- Remove any caked detergent
-
Clean with hot water
- Run very hot water over the dispenser area
- Use an old toothbrush to scrub all crevices
- Pay attention to the hinge and latch areas
-
Vinegar soak
- Pour warm vinegar directly into the dispenser
- Let sit for 15-20 minutes
- Scrub with brush and rinse
-
Check the door seal area
- Remove any buildup around the door edges
- Ensure the door sits flat when closed
-
Clean the latch mechanism
- Locate the latch that holds the door closed
- Gently clean around and behind it
- Test that it moves freely
-
Dry and test
- Wipe dry with clean cloth
- Close door and ensure it latches properly
- Run an empty test cycle
Solution 2: Check for Physical Obstructions
The Problem: Something is blocking the dispenser door from opening fully.
Obstruction Checklist:
-
Dish placement
- Large items blocking the dispenser
- Tall items in the wrong rack position
- Pan handles or utensil handles in the way
-
Spray arm interference
- Upper spray arm hitting dispenser door
- Items blocking spray arm rotation
- Spray arm not seated properly
-
Rack position
- Upper rack not fully pushed in
- Rack adjustment tabs in wrong position
- Rack wheels off track
-
Door/gasket issues
- Door not closing fully
- Gasket interfering with dispenser area
- Door warped or misaligned
Testing Proper Movement:
- Remove all dishes
- Close the dispenser door
- Close the main door
- Open main door immediately
- Check if dispenser door can swing freely
- Load dishes paying attention to clearance
Solution 3: Test and Replace the Bi-Metal Release
The Problem: The bi-metal release strip heats up and bends to release the latch. If it fails, the door stays closed.
Bi-Metal Testing:
-
Locate the bi-metal assembly
- Usually behind the dispenser panel
- May require inner door panel removal
-
Visual inspection
- Look for burn marks or damage
- Check wire connections
-
Continuity test
- Disconnect power to dishwasher
- Remove wires from bi-metal
- Set multimeter to continuity
- Touch probes to terminals
- Should show continuity (beep)
-
Resistance test
- Set multimeter to ohms
- Normal reading: 100-300 ohms
- No reading = failed bi-metal
Replacement Steps:
- Order correct replacement part for your model
- Disconnect power completely
- Remove inner door panel (usually screws around edges)
- Disconnect wire harness from bi-metal
- Remove mounting screws or clips
- Install new bi-metal in reverse order
- Reconnect wires and test
Replacement Cost: $15-$40 for part; $100-$150 if professional install
Solution 4: Inspect the Wax Motor
The Problem: Many modern dishwashers use a wax motor instead of bi-metal. When heated, the wax expands to release the latch.
Wax Motor Symptoms:
- Clicking sound but no release
- Inconsistent operation
- Works sometimes but not always
Testing the Wax Motor:
-
Access the wax motor
- Located behind inner door panel
- Connected to dispenser mechanism
-
Check electrical connections
- Ensure wires are secure
- Look for corrosion on terminals
-
Test with multimeter
- Disconnect and test for resistance
- Should read 1,000-3,000 ohms
- Open/infinite reading = motor failed
-
Manual operation test
- Disconnect motor from mechanism
- Run cycle to see if control sends signal
- Check if motor heats slightly when powered
Brand-Specific Wax Motor Details:
Bosch Wax Motor:
- Part location: Behind detergent dispenser
- Common failure: After 6-8 years
- Part #: 166635 or similar
- Replacement difficulty: Moderate
Whirlpool/KitchenAid Wax Motor:
- Part location: Inside door panel
- Common failure: 5-7 years
- Part #: W10195917 or similar
- Replacement difficulty: Moderate
Samsung Dispenser Actuator:
- Uses electronic actuator
- Part location: Behind dispenser
- Part #: DD81-01629A or similar
- Replacement difficulty: Moderate to difficult
Solution 5: Check the Door Latch and Spring
The Problem: A worn latch won't hold the door closed, or a weak spring won't push it open.
Latch Inspection:
-
Check latch engagement
- Close dispenser door slowly
- Listen for click
- Pull gently—should stay closed
-
Examine latch condition
- Look for wear on latch hook
- Check for cracks or breakage
- Ensure pivot points move freely
-
Test spring tension
- Open dispenser door
- Note springback force
- Weak spring = slow opening
Spring Replacement:
- Access the dispenser mechanism
- Locate the torsion or compression spring
- Note orientation before removing
- Carefully remove old spring
- Install new spring in exact same position
- Test door operation
Solution 6: Verify Water Temperature
The Problem: The bi-metal release requires sufficient heat to activate. Low water temperature prevents proper function.
Temperature Verification:
-
Check water heater setting
- Should be 120-125°F (49-52°C)
- Lower temperatures cause problems
-
Run hot water before starting
- Turn on kitchen faucet
- Wait until very hot
- Then start dishwasher
-
Test incoming water temperature
- Use thermometer at kitchen sink
- Should be at least 120°F
-
Check heating element
- Dishwasher should boost water to 140-150°F
- Failed heating element = low wash temperature
Solution 7: Control Board and Timer Issues
The Problem: The control board or timer signals when to release the dispenser. Failure means no signal sent.
Control Board Diagnosis:
Symptoms of control board failure:
- No clicking from dispenser at all
- Other cycle functions also affected
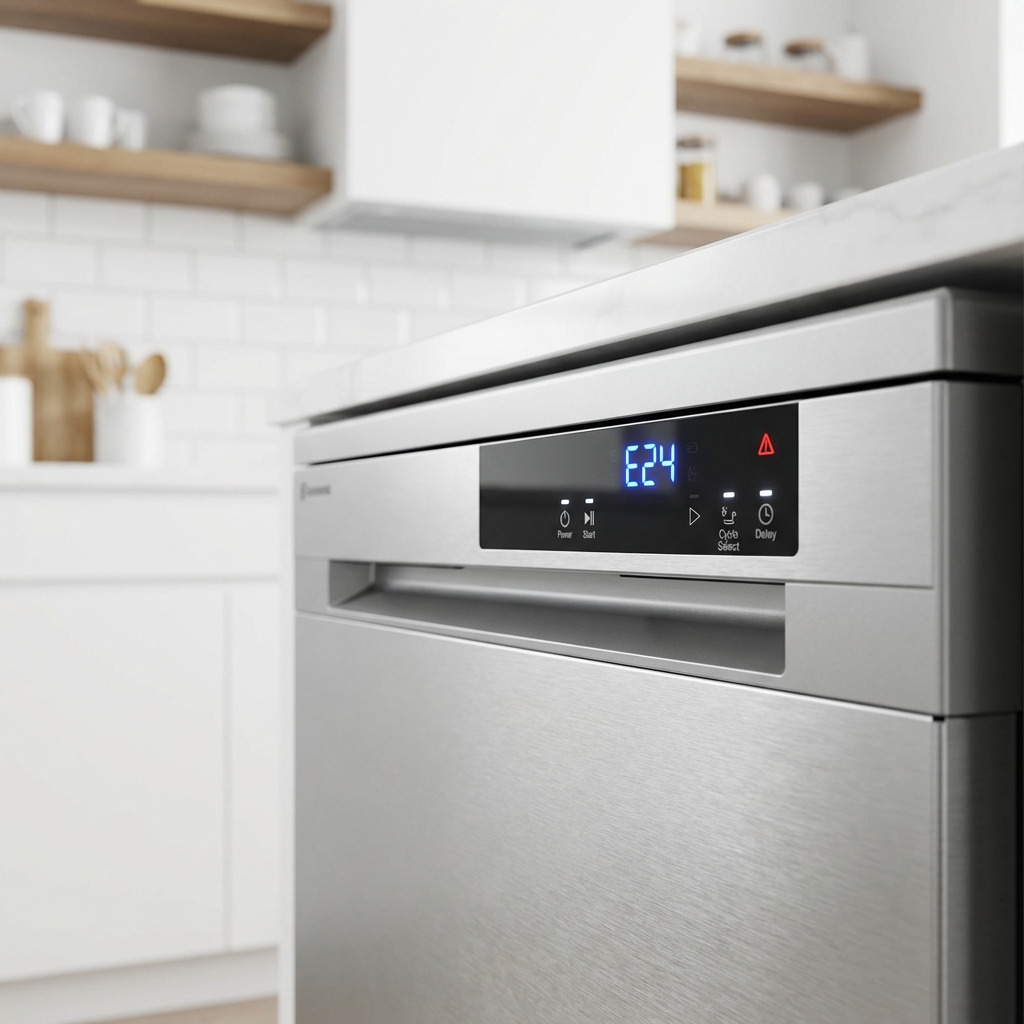
- Error codes on display
- Random cycle behavior
Testing Approach:
-
Run diagnostic mode
- Enter service mode per manufacturer
- Check if dispenser test functions
-
Listen for relay click
- At correct cycle point, you should hear click
- No click = possible board issue
-
Check wiring connections
- Inspect harness to dispenser
- Look for loose, burnt, or corroded connections
-
Professional diagnosis
- Control boards require expertise to test
- Replacement costs $150-$400
Brand-Specific Dispenser Issues
Bosch Dishwasher Dispenser Problems
Common Issues:
- Zeolite-related humidity affecting mechanism
- Bi-metal failures common after 6 years
- Rinse aid compartment overflow affecting detergent door
Model-Specific Notes:
- 800 Series: Uses electronic actuator
- 500 Series: Bi-metal release
- Silence Plus: Check door strike alignment
Samsung Dishwasher Dispenser Problems
Common Issues:
- Electronic actuator failure
- Door hinge wear
- Control board communication errors
Error Codes Related to Dispenser:
- No specific dispenser code, but 4E/4C (water) affects operation
- Check detergent type compatibility
LG Dishwasher Dispenser Problems
Common Issues:
- Dispenser door hinge breakage
- Spring mechanism wear
- TrueSteam affecting dispenser area
Solutions:
- LG offers dispenser door replacement kits
- Check door for cracks at hinge points
Whirlpool/KitchenAid Dispenser Problems
Common Issues:
- Wax motor failure
- Detergent compartment cover warping
- Latch mechanism wear
Model-Specific Notes:
- Top control models: Access from inside
- Front control: May need door panel removal
- Check part compatibility carefully—many variations
GE Dishwasher Dispenser Problems
Common Issues:
- Dispenser cover cracking
- Rinse aid cap threads stripping
- Bi-metal or electronic release failure
Miele Dishwasher Dispenser Problems
Common Issues:
- AutoDos system errors
- Electronic release mechanism failure
- Rinse aid level sensor issues
Professional Recommendation:
- Miele dispensers often require OEM parts
- DIY repair can void warranty
- Consider authorized service for premium models
Detergent Recommendations
Using the Right Detergent Helps:
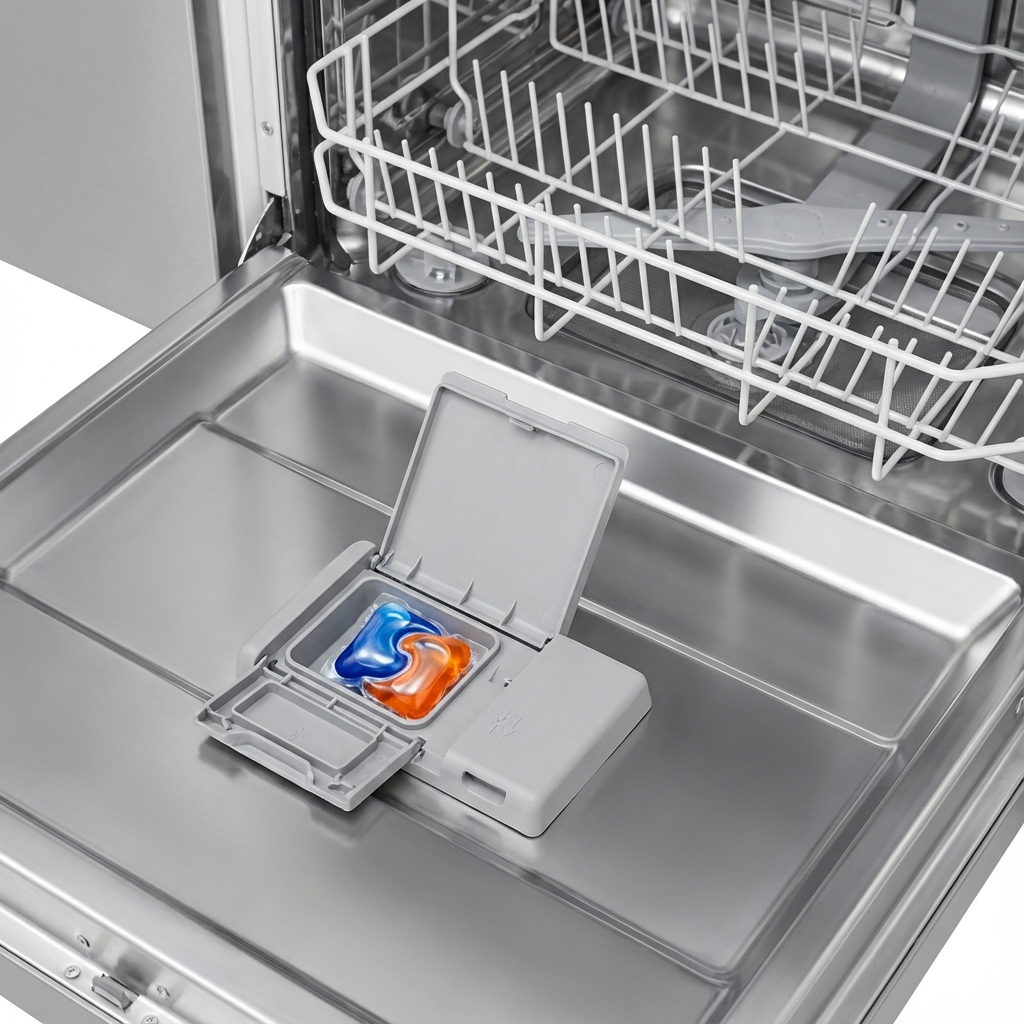
Best for Dispenser Reliability:
- Pods/tablets (won't clog mechanism)
- Quality powder (dissolves completely)
- Liquid designed for dishwashers
Avoid:
- Bargain brands that clump
- Hand dish soap (causes excess suds)
- Storing detergent in humid areas
- Using too much detergent
When to Call a Professional
Seek Professional Help If:
- Control board replacement needed
- Dispenser as
Common Questions People Ask
Q: Is it normal for my dishwasher to working? complete repair guide? No, this is not normal behavior and indicates an underlying issue that should be addressed promptly to prevent further damage.
Q: Can I fix this dishwasher problem myself? Some basic issues can be resolved with DIY troubleshooting, but complex problems require professional diagnosis to avoid safety risks and warranty issues.
Q: How much does professional dishwasher repair cost in Toronto? Repair costs typically range from $150-$400 depending on the specific issue and parts needed. Our technicians provide free estimates before any work begins.
Q: How long does dishwasher repair take? Most repairs are completed within 1-2 hours during a single visit. Some cases may require ordering specialty parts with a follow-up appointment.
Q: Should I repair or replace my dishwasher? If your dishwasher is less than 8 years old and repair costs are under 50% of replacement cost, repair is usually the better value. Our technicians can help you make the right decision.
Q: Do you offer same-day dishwasher repair in Toronto? Yes! We offer same-day and emergency repair services throughout Toronto and the Greater Toronto Area for urgent issues.
Q: What brands of dishwasher do you repair? We service all major brands including Bosch, Samsung, LG, Whirlpool, KitchenAid, GE, Maytag, Frigidaire, Miele, and more.
Q: Is dishwasher repair covered by warranty? Many dishwasher issues are covered under manufacturer warranty. We can help verify your warranty status and handle claim processing.
sembly requires replacement
- Door panel disassembly required
- Wiring issues suspected
- Under warranty (avoid voiding)
Estimated Professional Repair Costs:
- Diagnostic fee: $80-$120 (waived with repair)
- Dispenser assembly replacement: $150-$250
- Control board replacement: $200-$450
- Wax motor/bi-metal replacement: $100-$180
Frequently Asked Questions About Dishwasher Detergent Dispensers
Q: Why won't my dishwasher detergent dispenser open during the wash cycle? A: Dishwasher detergent dispensers fail to open due to mechanical, electrical, or control issues: Stuck latch mechanisms from dried detergent residue building up over months preventing release (most common—clean thoroughly with hot water and vinegar). Failed bi-metal release strip or wax motor not receiving electrical signal or unable to generate heat for latch release requires testing with multimeter. Physical obstructions include dishes blocking door swing path, upper rack positioned too low, or spray arms interfering with dispenser movement. Control board malfunction means timer or electronic control not sending open signal at proper cycle point. Low water temperature preventing bi-metal strip from heating sufficiently for activation—run hot water at sink before starting or check water heater settings. Broken spring mechanism unable to push door open even when latch releases. Start diagnosis by cleaning dispenser thoroughly, testing with empty dishwasher to eliminate loading problems, and listening for clicking sound indicating release attempt.
Q: How do I clean a dishwasher detergent dispenser that's stuck closed? A: Clean stuck dishwasher dispensers using this systematic approach: First, open dispenser door fully and remove all visible caked detergent with old toothbrush. Second, pour warm white vinegar directly into dispenser cup and let soak 15-20 minutes to dissolve mineral deposits and detergent residue. Third, scrub all surfaces including hinge areas, latch mechanism, and door seal with soft brush while rinsing under hot running water. Fourth, clean behind and around latch that holds door closed—this area accumulates most buildup. Fifth, dry completely with clean cloth and test latch engagement by closing door (should click securely). Sixth, run empty test cycle to verify door opens properly. For stubborn buildup, make paste of baking soda and water, apply to affected areas, let sit 10 minutes, then scrub and rinse. Regular monthly cleaning prevents 80% of dispenser problems—clean dispenser whenever you notice detergent residue or dishes aren't getting clean.
Q: Can I still run my dishwasher if the detergent dispenser is broken? A: Yes, you can temporarily run your dishwasher with broken dispenser using workaround methods, but cleaning performance will be suboptimal: Place dishwasher detergent (powder or liquid) directly in bottom of dishwasher tub before loading dishes—detergent will mix with water from start of cycle rather than at optimal mid-cycle point. Use slightly less detergent than normal (reduced by 25%) as it will be active longer during cycle. Avoid using pods/tablets directly in tub as they may not dissolve properly without dispenser's timed release. Alternatively, place detergent in silverware basket away from spray arm. Limitations of this method: detergent partially washes away during pre-rinse reducing cleaning power, timing not optimized for best results, may see more water spots and residue. This temporary solution works for days/weeks while arranging professional dishwasher repair but not recommended long-term—proper timed dispersal significantly improves cleaning effectiveness and efficiency.
Q: How much does it cost to replace a dishwasher detergent dispenser in Toronto? A: Dishwasher dispenser repair costs in Toronto vary by component and brand: Diagnostic fees run $80-120 but are waived when proceeding with repair. Simple cleaning service (if dispenser just clogged) costs $100-150 for service call and cleaning. Bi-metal release strip replacement includes $15-40 part plus $85-110 labor = $100-150 total. Wax motor replacement runs $25-60 for part plus $75-120 labor = $100-180 total. Complete dispenser assembly replacement (when housing cracked or multiple components failed) costs $40-100 for assembly plus $100-150 labor = $140-250 total. Electronic actuator replacement (Samsung, Bosch electronic models) runs $50-80 part plus $100-150 labor = $150-230. Control board replacement if that's root cause is $150-400 total. At JK Appliances Toronto, most dispenser repairs complete in single visit for $100-180. Compare to $600-1500 new dishwasher cost—repair is economical for dishwashers under 8 years old. We stock common dispenser parts for same-day repair throughout Greater Toronto Area.
Q: Why does detergent remain in the dispenser after the cycle ends? A: Detergent remaining in dispenser after cycle indicates incomplete release or dissolution problems: Dispenser door opened but spring too weak to fully swing door open, leaving detergent partially trapped in cup. Low water temperature (below 120°F) prevents powder detergent from fully dissolving—check water heater settings and run hot water before starting cycle. Insufficient water spray reaching dispenser area due to clogged spray arms, blocked spray holes, or low water pressure. Detergent clumping from moisture absorption in humid storage—store detergent in cool, dry location with container tightly sealed. Wrong detergent type—avoid hand dish soap (causes excessive suds), use only automatic dishwasher-specific detergent. Dispenser door opened too late in cycle providing insufficient time for dissolution. Partial door opening from restricted movement or weak spring. Test by running cycle with just water (no dishes, no detergent) and observing if door opens fully—if door doesn't swing completely open, spring or release mechanism needs service.
Q: Can I replace a dishwasher detergent dispenser myself? A: DIY dishwasher dispenser replacement is possible for mechanically inclined homeowners but requires moderate skill level: Accessibility varies significantly—front control dishwashers require removing inner door panel (8-12 screws around door perimeter), accessing components between inner and outer door panels in tight space. Tools needed include screwdrivers (Phillips and flat-head), possibly Torx drivers, multimeter for electrical testing, and flashlight for visibility. Steps involve disconnecting power at breaker (safety critical), removing door panel carefully (note wire routing), photographing connections before disconnecting anything, removing old dispenser assembly (typically 2-4 mounting screws), installing new assembly ensuring proper alignment with door latch, reconnecting wires matching photos, reassembling door panel, and testing operation. Challenges: tight working space, fragile plastic tabs easy to break, proper wire routing critical for door closure, and some models require control board programming after replacement. Success rate for DIY is 60-70%—consider professional service if uncomfortable with disassembly or if warranty coverage exists. Professional dishwasher repair technicians complete replacement in 45-60 minutes with proper parts and tools.
Q: What's the difference between bi-metal and wax motor dispensers? A: Bi-metal and wax motor dispensers represent two technologies for timed detergent release in dishwashers: Bi-metal release uses thin strip of two different metals bonded together that bends when heated due to different thermal expansion rates—electric current heats strip, bending releases latch. Found in older dishwashers and some current economy models, simpler design with fewer components, typical resistance 100-300 ohms, average lifespan 8-12 years, costs $15-40 to replace. Wax motor actuators use special wax that expands significantly when heated—electric heating element melts wax, expansion pushes plunger that releases latch. Used in most modern dishwashers (Bosch, Whirlpool, LG, Samsung), more precise timing control, typical resistance 1000-3000 ohms, average lifespan 6-10 years, costs $25-60 to replace. Both achieve same result through different mechanisms—control board sends electrical signal at proper cycle point, component heats up, latch releases, spring opens door. Wax motors generally provide more consistent performance but are slightly more expensive. Diagnosis similar for both—test electrical continuity, check for proper heating during cycle, verify mechanical release action works smoothly.
Q: Why does my dishwasher dispenser open too early in the cycle? A: Premature dispenser opening releases detergent during pre-rinse instead of main wash, significantly reducing cleaning effectiveness: Failed or worn latch spring unable to hold door closed against water spray pressure—even slight spray impact opens door before electronic release signal. Broken or weakened latch catch allowing door to pop open from vibration during fill and drain cycles. Warped or damaged dispenser door not seating properly in latch creating loose closure. Control board timing error sending release signal at wrong cycle point (rare but possible after power surges). Door seal deterioration allowing water to leak behind dispenser causing premature electrical activation of release mechanism. Physical damage to dispenser housing from impact or stress. Overfilled detergent cup creating outward pressure that overcomes latch. To diagnose, load dishwasher normally, add detergent, start cycle, and interrupt after 5 minutes to check if dispenser opened (should still be closed during pre-rinse)—if already open, latch mechanism needs replacement. Temporary fix: reduce detergent amount, ensure door fully latches with audible click, but permanent repair requires latch or spring replacement for reliable operation.
Q: Does the type of detergent affect dispenser performance? A: Yes, detergent type significantly impacts dispenser reliability and cleaning results: Pods/tablets are optimal for dispenser health—pre-measured, no residue buildup in cup, consistent dissolution, reduced clogging. Quality powder detergents work well when stored properly but can clump from humidity, cake in dispenser if moisture gets in storage container, require more frequent dispenser cleaning monthly. Liquid detergents pour cleanly but can leave sticky residue over time, may drip or leak prematurely if dispenser seal worn, require dish wipe-down of cup after filling. Avoid: hand dish soap (creates excessive suds damaging pump and seals), bargain brands with excessive fillers causing buildup, expired or clumped detergent that won't dissolve. Storage matters: keep detergent in cool, dry location away from humidity, seal containers tightly after each use, don't store under sink near water sources. Use correct amount: more isn't better—excess detergent creates residue, leaves film on dishes and dispenser, can prevent door from opening properly. Follow manufacturer recommendations: check dishwasher manual for recommended detergent types, use HE (high-efficiency) formulas for modern dishwashers, adjust amount based on water hardness. Quality brands like Cascade, Finish, and Seventh Generation formulated to minimize buildup and optimize dispenser performance.
Q: How do I test if my detergent dispenser's release mechanism is working? A: Test dishwasher dispenser release mechanism using these diagnostic methods: Visual test: Start normal cycle, wait 15-20 minutes (past pre-rinse, into main wash phase), carefully open dishwasher door mid-cycle, check if dispenser door has opened—should be fully swung open with empty cup. Audio test: Listen during cycle for distinct clicking sound approximately 1015 minutes into cycle indicating latch release attempt (wear hearing protection if needed due to water noise). Empty cycle test: Run complete cycle without dishes or detergent, check solely for mechanical door opening to eliminate loading/spray interference variables. Electrical test (advanced): Disconnect power, access dispenser assembly, disconnect wires from release mechanism (bi-metal or wax motor), test resistance with multimeter set to ohms (bi-metal: 100-300 ohms normal, wax motor: 1000-3000 ohms normal), infinite/open reading indicates failed component. Manual release test: While dispenser door is latched closed, carefully apply 120V to release mechanism terminals for 30-60 seconds (only if experienced with electrical work)—should heat and release latch. If clicking heard but door stays closed: mechanical jam, broken spring, or physical obstruction. If no clicking heard: control board not sending signal, failed release mechanism, or wiring problem. Professional testing includes cycle monitoring, voltage testing during operation, and component load testing—contact certified technician for comprehensive diagnosis if DIY tests inconclusive.
Q: Can hard water cause dishwasher dispenser problems? A: Yes, [hard water](/blog/dishwa
sher-water-hardness-toronto) is a leading cause of dispenser failures in Toronto's water conditions (averaging 7-10 grains per gallon hardness): Mineral deposits accumulate on latch mechanism creating friction and preventing smooth release, build up around hinge causing stiffness and reduced door swing, coat bi-metal strip or wax motor reducing heat transfer efficiency, and form scale inside spring mechanism affecting tension. Detergent interaction issues include powder detergent combining with minerals to create stubborn residue, calcium and magnesium deposits cementing in dispenser cup, and hard water reducing detergent effectiveness requiring more detergent that increases buildup. Prevention strategies: Use rinse aid religiously—reduces mineral deposits throughout dishwasher including dispenser area. Clean dispenser monthly with vinegar soak (15-20 minutes) dissolving mineral buildup. Consider water softener for whole house if hardness exceeds 10 grains per gallon reducing scale throughout plumbing. Use quality detergent formulated for hard water (Finish and Cascade have hardwater formulas). Run empty cleaning cycle monthly with dishwasher cleaner (Affresh, Finish, or 2 cups white vinegar). Test water hardness with test strips available at hardware stores. Signs hard water affecting dispenser: white crusty deposits visible on dispenser, gradual performance decline over months, door sticks or opens sluggishly, and clicking sound but delayed or no opening. Hard water damage is cumulative—address early before requiring component replacement rather than just cleaning.
Q: What brands have the most reliable dishwasher dispensers? A: Dishwasher dispenser reliability varies by brand and technology used: Most Reliable: Miele dishwashers use robust electronic actuators with 10-15 year average life expectancy, German engineering with minimal plastic components, and excellent build quality justifying premium pricing. Bosch dishwashers (/brands/bosch) feature well-engineered wax motors with 8-12 year reliability, strong European design standards, but moisture sensitivity in some series. Highly Reliable: Whirlpool/KitchenAid use proven wax motor designs with 7-10 year average life, readily available replacement parts, and straightforward repair access. GE and Frigidaire offer mid-range reliability averaging 6-9 years with economical bi-metal systems. Variable Reliability: Samsung and LG modern electronic actuators reliable in newer models (2018+) but earlier generations (2012-2017) had higher failure rates averaging 5-7 years. Technologies ranked by durability: Electronic solenoid actuators (longest life but most expensive), wax motors (balanced cost/reliability), bi-metal strips (economical but shorter life averaging 5-8 years). Regardless of brand, proper maintenance extends dispenser life significantly—monthly cleaning, using quality detergent, proper loading preventing impact damage, and addressing hard water all improve reliability across all brands. When purchasing new dishwasher, prioritize models with proven dispenser designs over newest technologies still being perfected.
Professional Dishwasher Service Toronto
Same-Day Service Available: At JK Appliances, we stock common dispenser components for fast repairs.
Service Areas:
- Downtown Toronto
- North York
- Scarborough
- Etobicoke
- Mississauga
- Brampton
- Markham
- Richmond Hill
- Vaughan
- Ajax
- Oakville
- Burlington
Dishwasher detergent dispenser not opening in Toronto? Contact JK Appliances at +1 647-560-8966 for expert diagnosis and same-day repair. We fix all major dishwasher brands including Bosch, Samsung, LG, and Whirlpool!
Expert Tips & Pro Insights
💡 Pro Tip: Regular maintenance can prevent 80% of appliance problems. Follow manufacturer guidelines for cleaning and care.
⚠️ Safety Warning: Always disconnect power before attempting any repairs or inspections. If you smell gas, evacuate immediately and call emergency services.
🔧 Technician Insight: Many issues that seem complex often have simple solutions. Start with basic troubleshooting before assuming the worst.
📞 When to Call a Professional: If you encounter electrical components, gas lines, refrigerant systems, or if basic troubleshooting doesn't resolve the issue, it's time to call an expert.